

This post may contain affiliate links. Please read our disclosure policy.
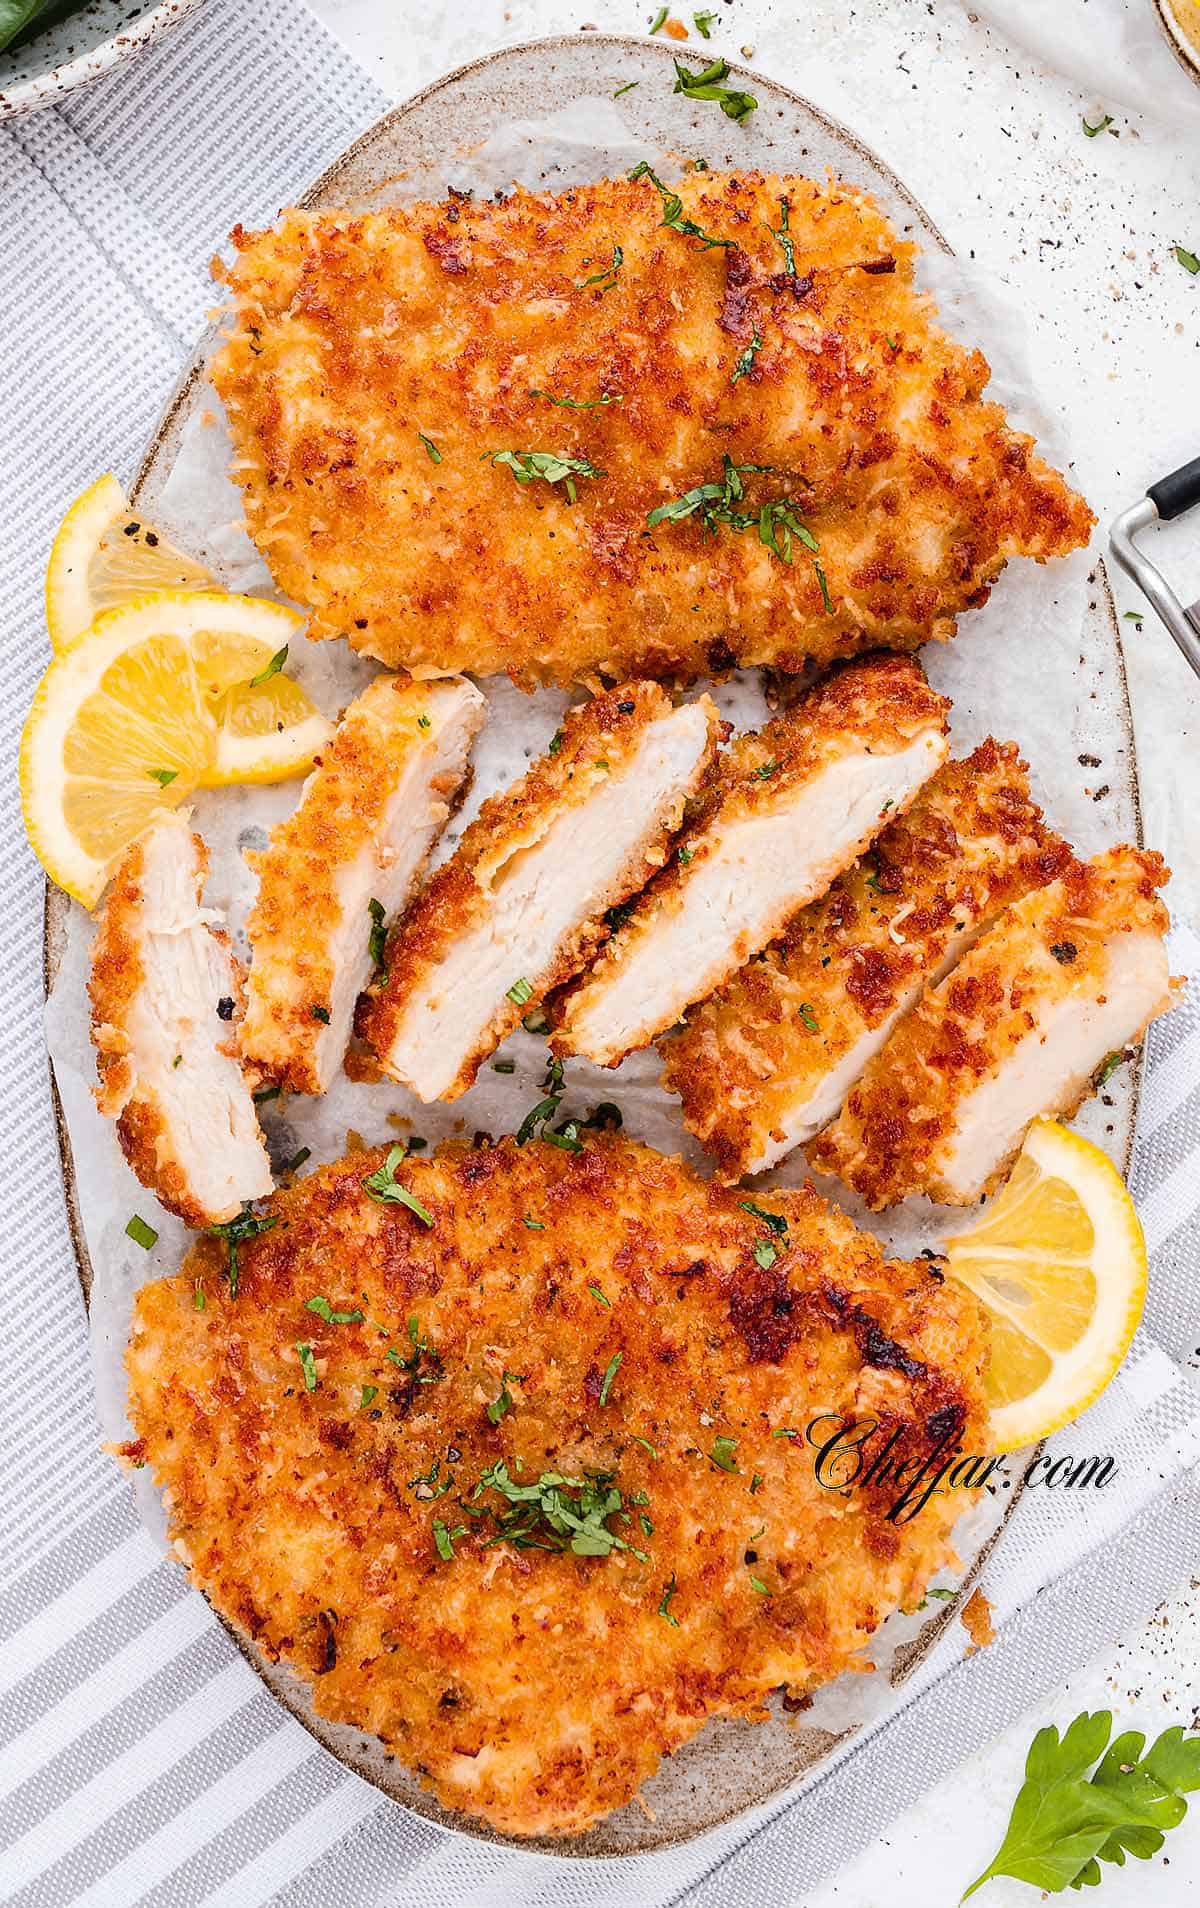
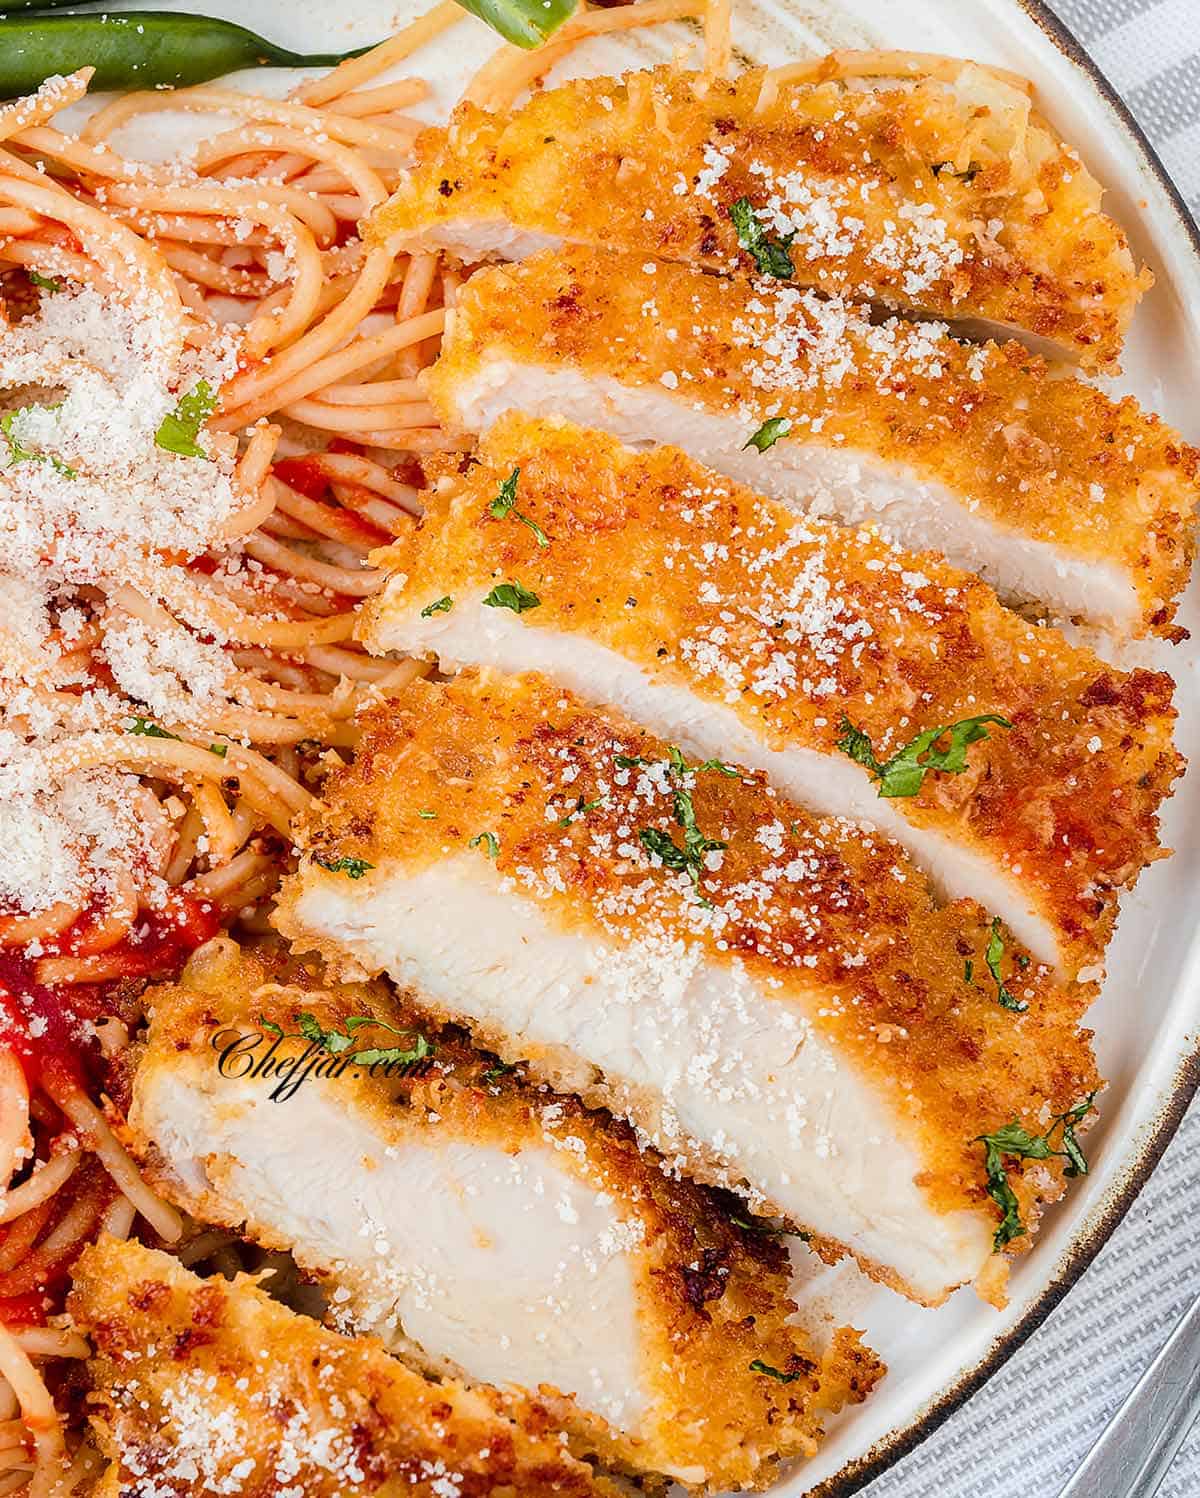
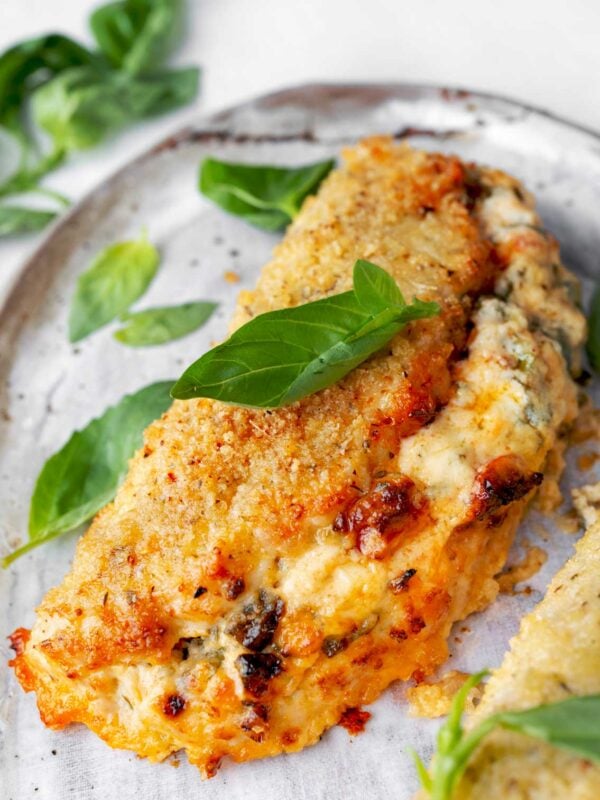
This crusted chicken Romano has the ultra-crispy crust and phenomenal flavor. Juicy chicken cutlets are coated in a mixture of Romano cheese and panko breadcrumbs and cooked until golden brown. Ready in 30 minutes.
Romano Crusted Chicken
With only a few key ingredients and about thirty minutes of cooking time, this is a surefire favorite and an easy solution for your next weeknight dinner.
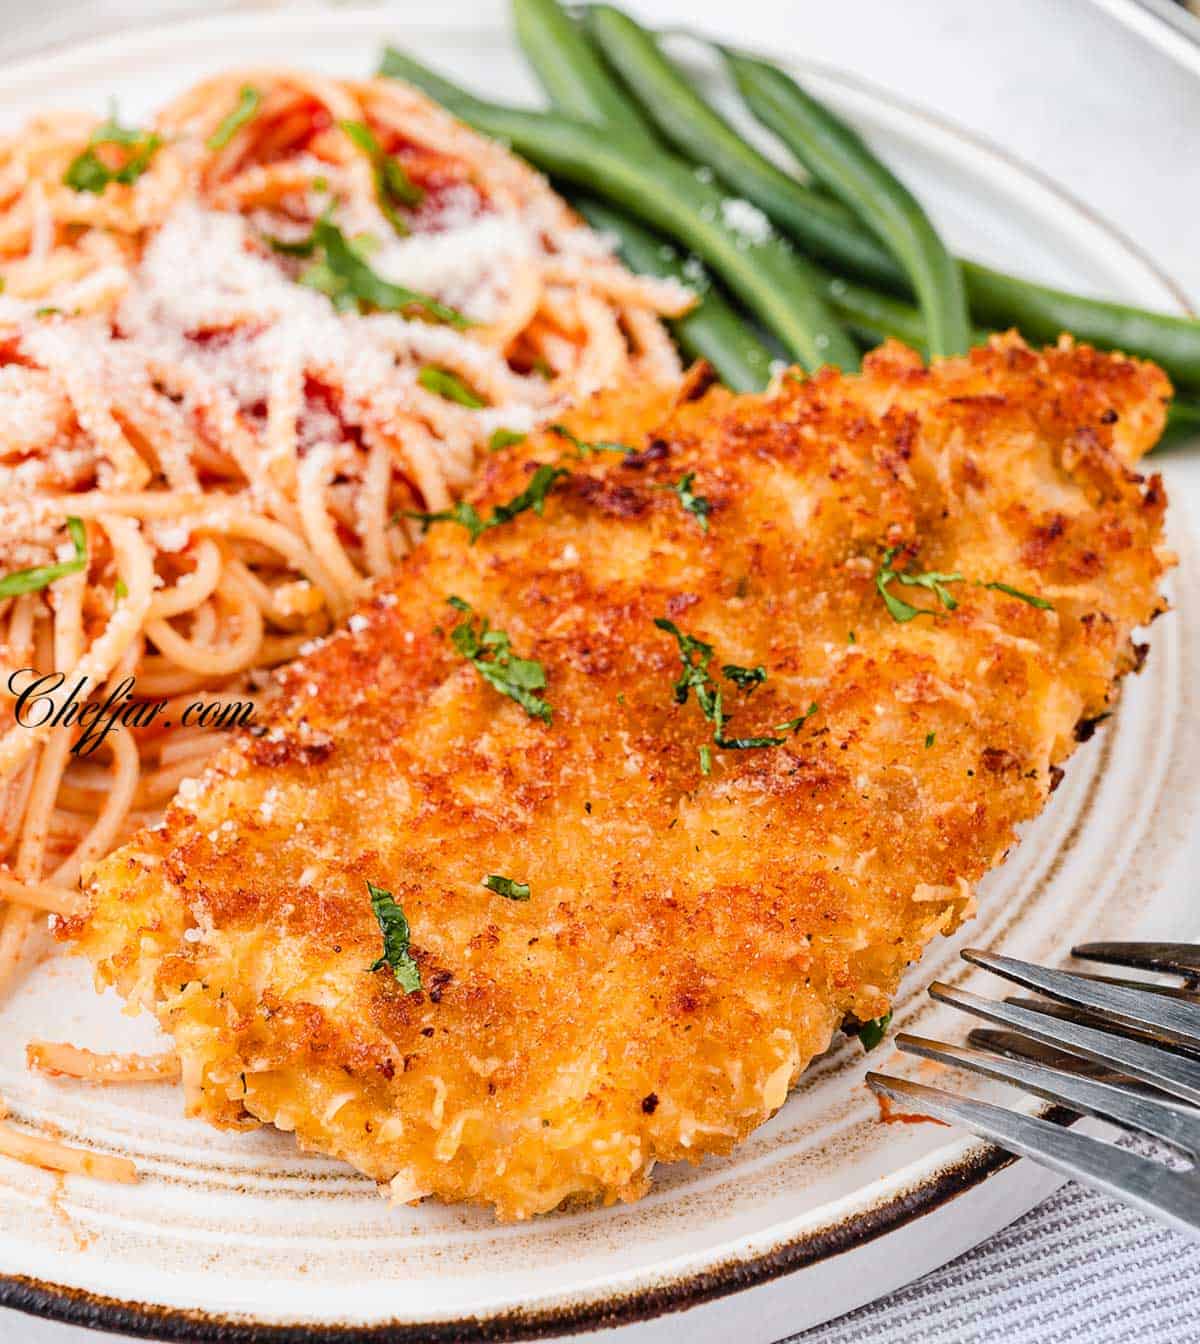
This thin, juicy chicken breast is coated in a crispy, tasty Romano crust. It’s served with spaghetti and a light tomato sauce. Simply delicious, and deliciously simple!
Why This is Great
- The delicious cheesy flavor of this cutlet really has to be tasted to be believed. It’s so easy to love! We’re using romano cheese to get that classic flavor.
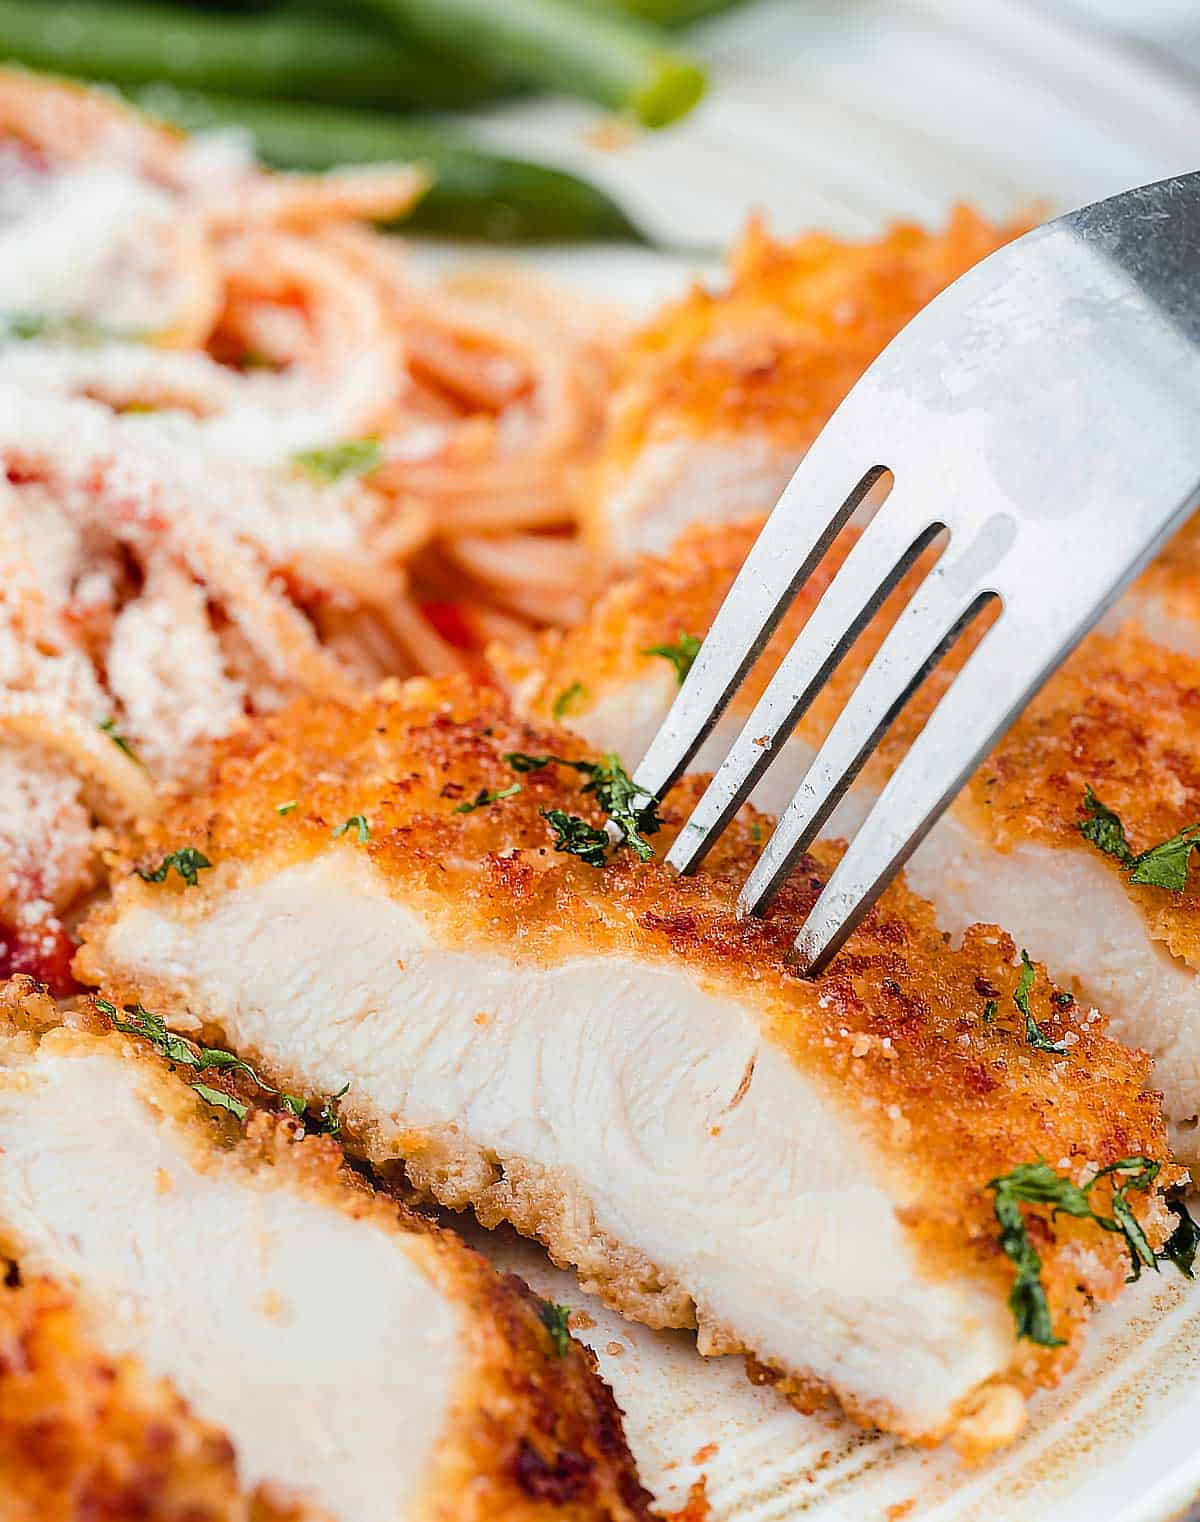
- The extra crispy crust really is the hero of this dinner. We’ve painstakingly worked out the best ratio of panko to cheese to get the perfectly crispy crust we all love. Too much cheese gives you a chewy exterior. The light, crispy crunch of panko is what we love about this recipe. The breadcrumbs are a key feature of this recipe.
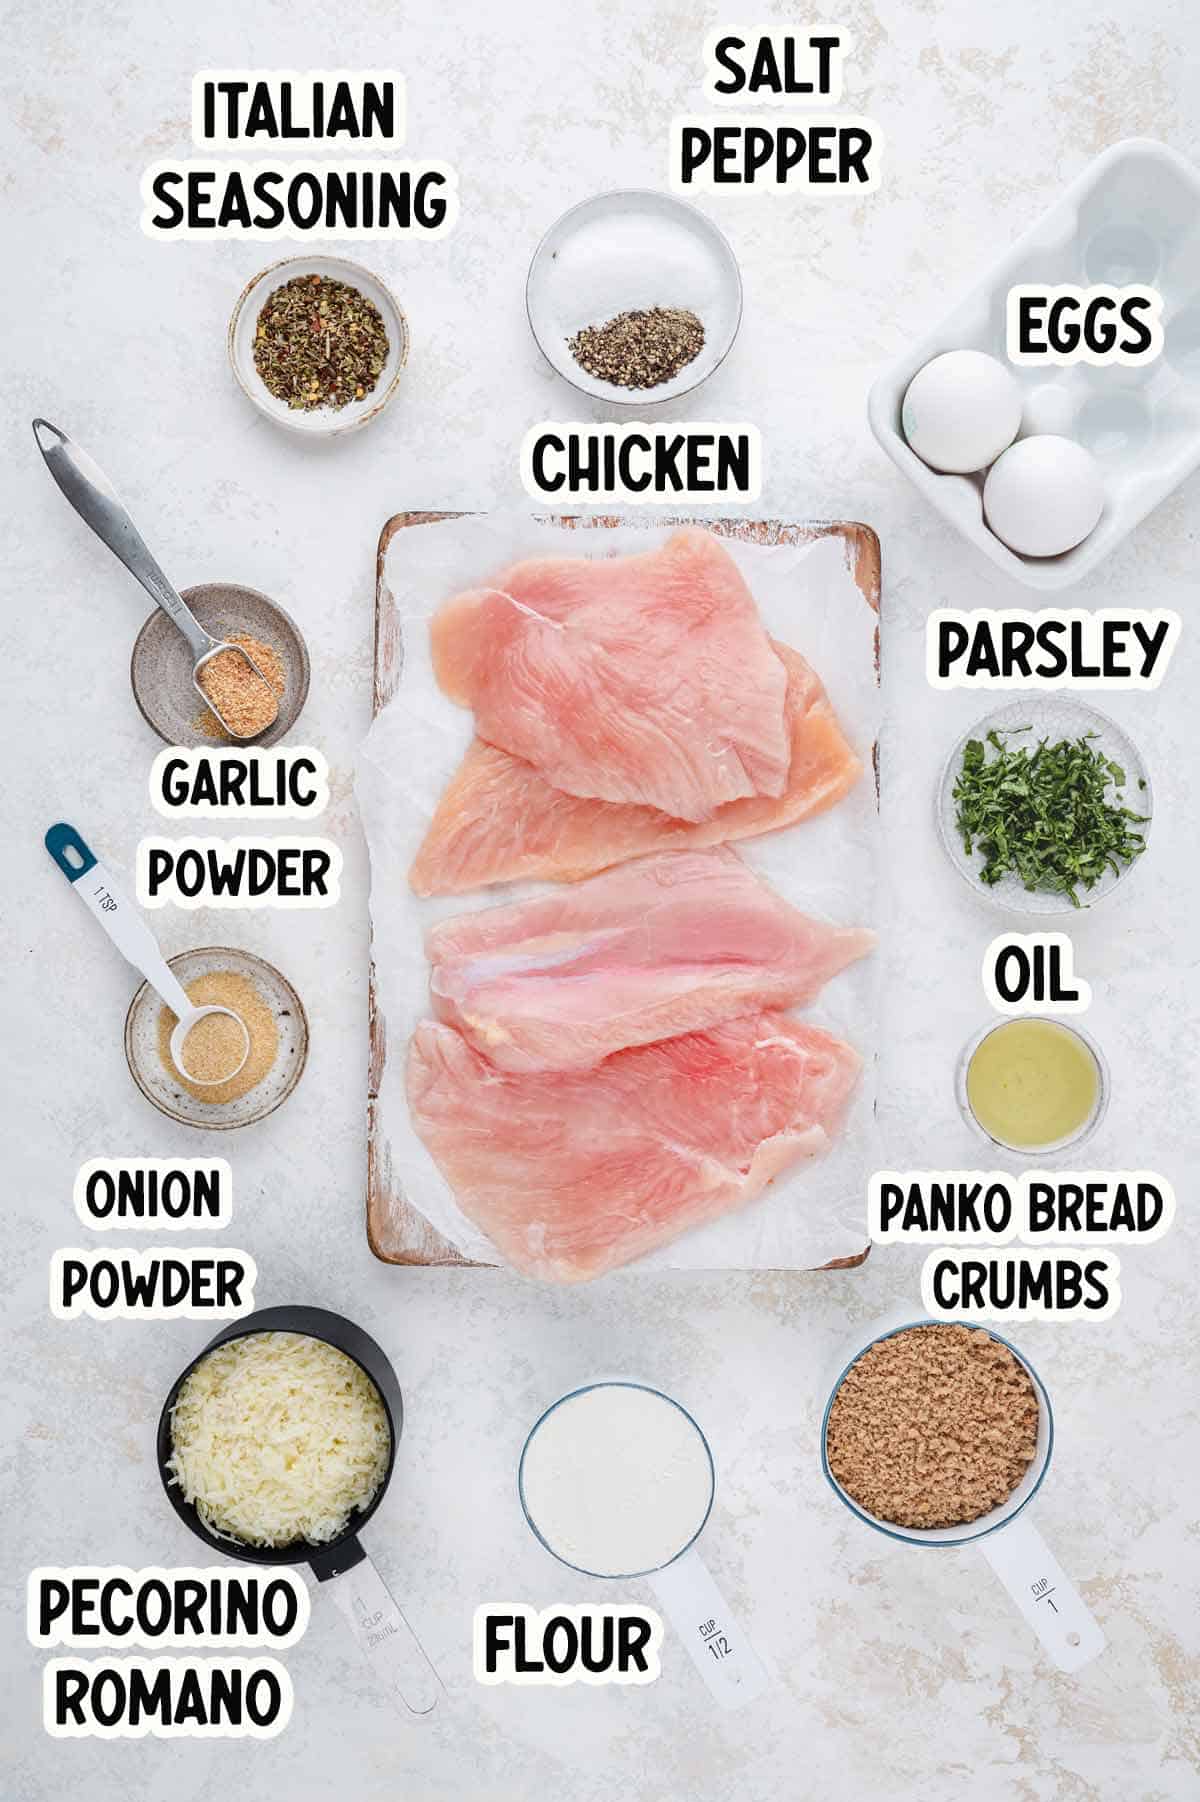
Ingredient notes
- Chicken breast. Make sure to either buy the extra thin chicken cutlets or cut thicker chicken breast into thin cutlets. You can cut boneless breasts in half horizontally and pound until they are about a quarter inch thick. Be sure to use breast, not thigh, as white meat is best for this recipe.
- We’re using Romano cheese. Romano is also often called by its full name, pecorino romano.
- Panko bread crumb. This specific type of bread crumb is absolutely vital to this recipe. We love the crispy crust that it forms. Regular breadcrumbs just don’t have the same texture! You can use whole wheat or regular Panko bread crumbs.
- We’re using canola oil, but any neutral vegetable oil will do a great job for this recipe. We’d recommend avoiding a strongly flavored oil (like coconut or extra virgin olive oil) as this can overpower the flavor of Romano cheese.
How to Make Crusted Chicken Romano
- To start with, we need to use chicken breasts pounded to a thickness of about a quarter inch. It’s best for these to be on the thinner side over being too thick. This is critical for the chicken having the right texture and moisture.
- The next step is to take three shallow dishes to make your breading components. In one dish place your flour and seasonings, in another the eggs, and in the final dish put your panko and cheeses. This makes it really easy to coat your chicken pieces.
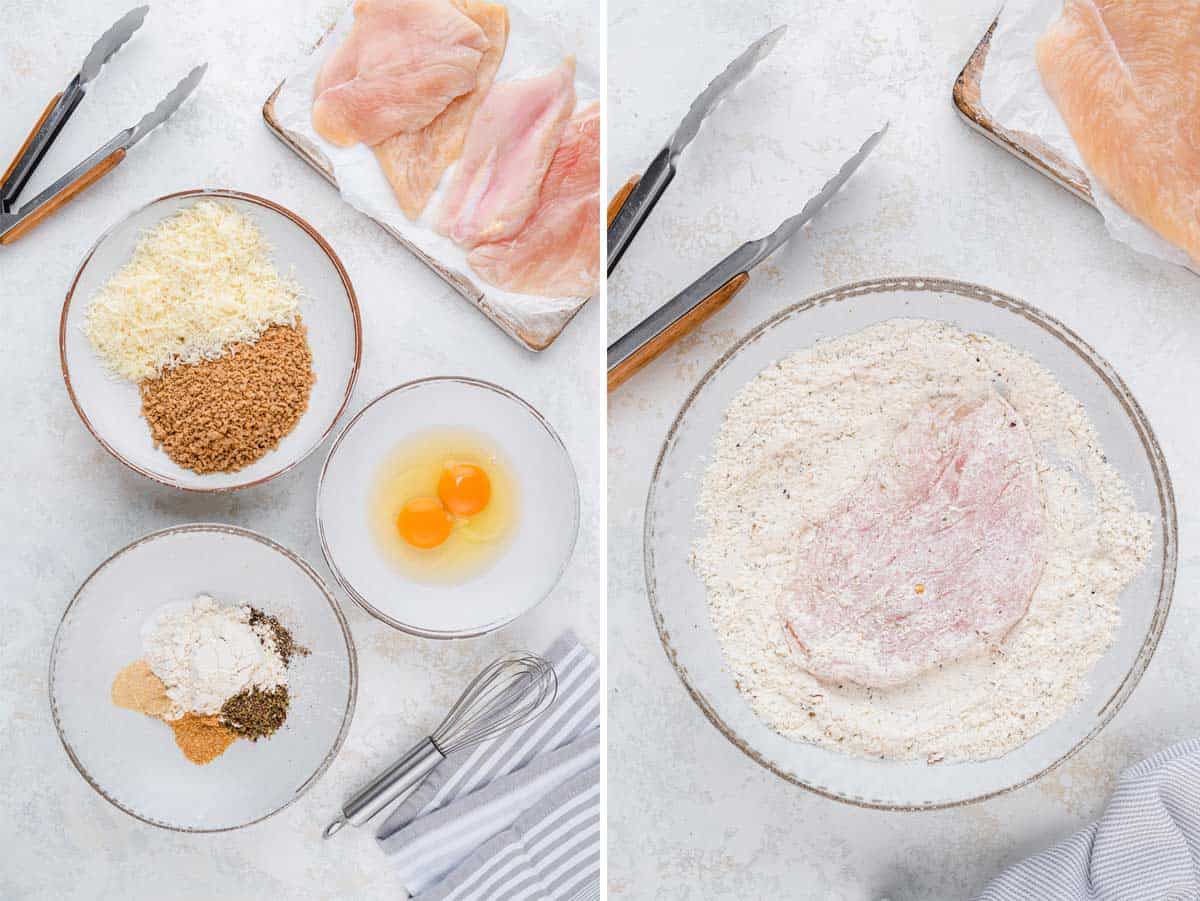
Breading the Chicken
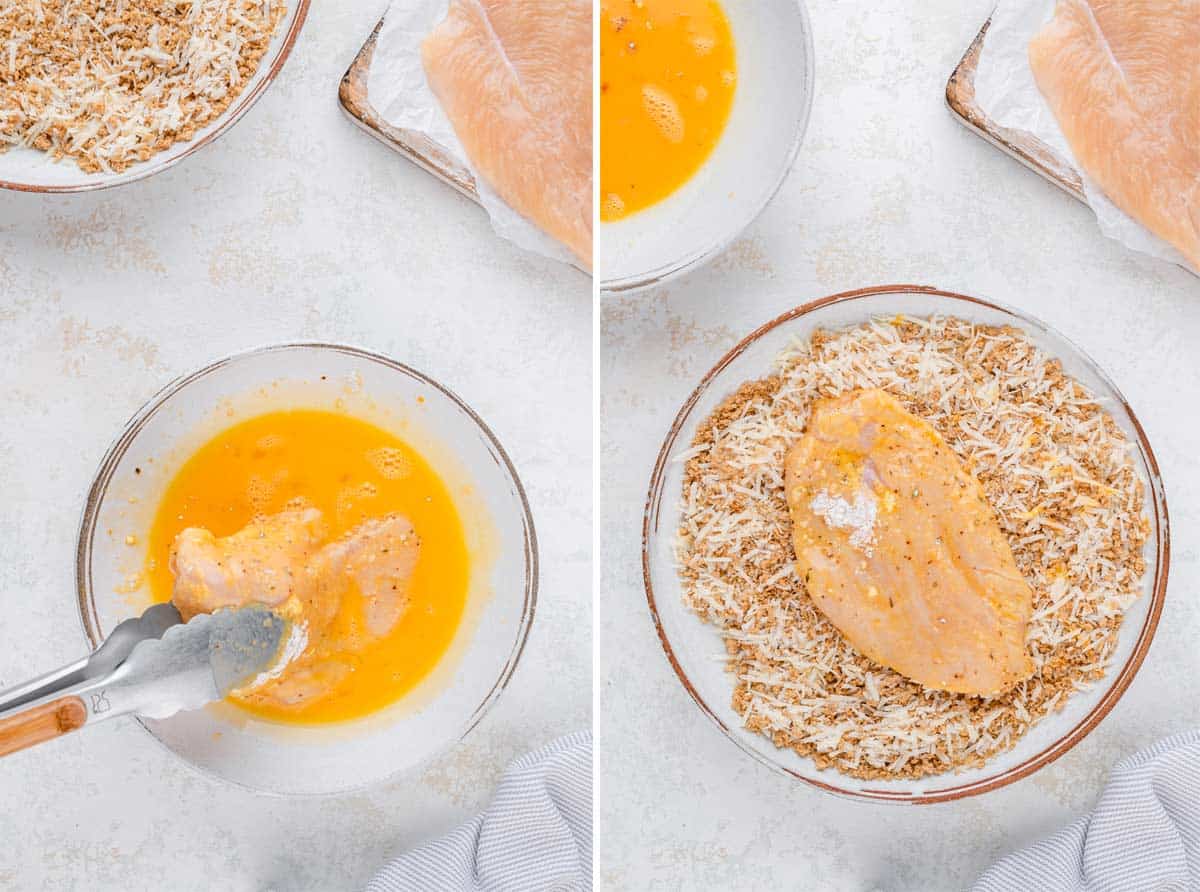
- The first step is to dip each piece of chicken in your flour mixture. Shake off any excess, allowing a small amount of flour to remain on the chicken breast. The second step is to dip your chicken in the egg wash, allowing any excess to drip off.
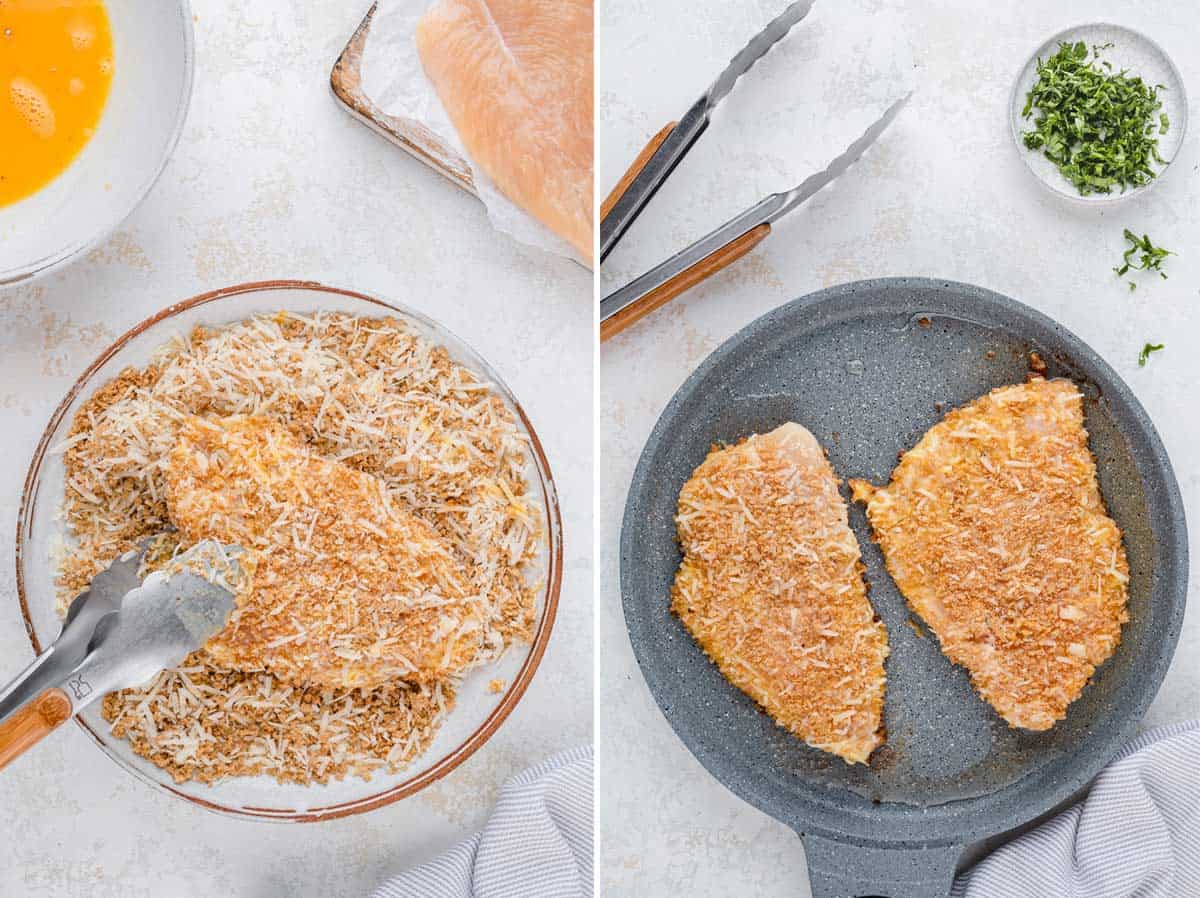
- Finally, dip your eggy breast into the panko and cheese mix. The egg should help the panko and cheese stick to your chicken breast. Set this aside for five minutes, allowing the panko to “set”. This really helps the breadcrumb mix stick to the chicken breast during the cooking process.
How to Cook Chicken Romano
- First, heat oil in a large skillet over medium high heat. An electric skillet set to about 375-400 degrees will do the trick very well. Cook your chicken cutlets for four to five minutes on each side. This should give you that lovely golden brown color for the crispy sear. Your chicken breasts should reach an internal temperature of 165 degrees.
- Once your chicken breasts are cooked all the way through, the trick is to remove your chicken breast from the skillet and place it on a cooling rack over some paper towels. This helps the juices in the chicken breast to settle in the meat, keeping it nice and tender, and allows any excess oil to drip off the chicken, giving you perfectly crispy chicken cutlets.
- Let them cool here for about five minutes before serving.
What to Serve with Chicken Romano
We love serving this dish with Sautéed Green Beans or some crusty bread. You can serve it with spaghetti and a creamy tomato sauce. To do this, you’ll need:
- 1 pound spaghetti
- 1 jar marinara sauce
- ⅓ to ½ a cup of half and half or heavy cream
Cook the pasta as directed. While it boils, warm marinara and cream in a skillet. Drain the pasta, toss it in the sauce, and it’s ready in a minute! Or try it with Alfredo or lemon-broccoli pasta for a twist.
Frequently Asked Questions
While this dish is best served fresh, you can definitely prepare your chicken breast and coating ingredients up to a day ahead of cooking, if you store them in the fridge.
These hard Italian cheeses are a little similar, but they have different tastes. Romano is aged in less time, which gives a stronger, saltier flavor. Parmesan can be sweeter, and more complex.

Other Great Chicken Breast Recipes
- Air Fryer Chicken Breast
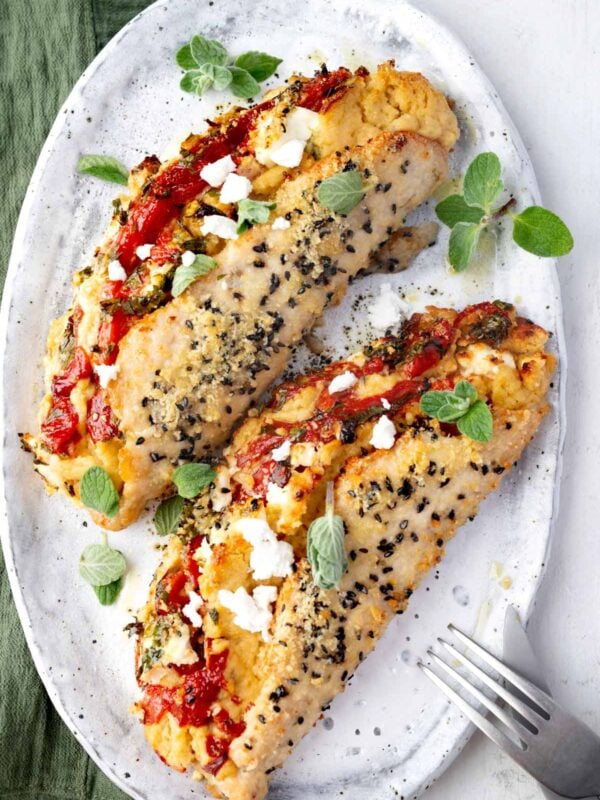
- Hummus Crusted Chicken Breast
- Creamy Garlic Chicken Breast
- Juicy Oven Baked Chicken Breast
- Chicken Tetrazzini
- Panda Express Mushroom Chicken
- Baked Breaded Chicken Cutlets
If you make this recipe be sure to leave a comment or give this recipe a rating ⭐⭐⭐⭐⭐! We will be happy to hear from you!
Pin this now to find it later
Pin It

Crusted Chicken Romano
Ingredients
- 2 1 pound boneless and skinless chicken breasts, cut in half horizontally to make 4 fillets
- 1/2 cup all purpose flour
- 1 1/2 teaspoon Italian seasoning
- Salt and pepper, to taste
- 1 teaspoon onion powder
- 1 teaspoon garlic powder
- 2 large eggs
- 1 cup panko bread crumbs
- 1 cup fresh grated Pecorino Romano
- 4 tablespoons neutral vegetable oil like Canola
- Fresh parsley and lemon wedges for serving
Instructions
- Cut each chicken breast in half horizontally to make four fillets. Cover with plastic wrap and gently pound out the chicken so that it is even, using the flat side of a meat mallet.
- In a shallow bowl, whisk together the flour, Italian seasoning, onion powder, garlic powder, salt and pepper.
- In a separate shallow dish whisk the eggs.
- Combine the Pecorino Romano cheese and and panko bread crumbs in another separate shallow dish.
- Season chicken fillets with salt and pepper on both sides. Then use tongs or a fork to pick up one of the chicken fillets and dredge in the flour until well coated, shake off excess flour. Then place in the eggs. Lift the chicken out and allow the excess egg drip off. Finally, place in the panko mixture, pressing firmly to help the breadcrumbs adhere.
- Heat oil in a large non-stick skillet or pan over medium high heat.
- Cook chicken in batches of two until golden brown, about 4 minutes. Don’t move the chicken around as the coating may peel off of the chicken.
- Flip and continue cooking on other side until cooked through. Your chicken breasts should reach an internal temperature of 165 degrees.
- Repeat with the remaining chicken.
- Garnish with fresh parsley.
- Serve with lemon wedges and enjoy!
Notes
Nutrition
Nutrition information is automatically calculated, so should only be used as an approximation.
All rights reserved. CHEF JAR. All images and content are copyright protected. PLEASE do not use my images without my permission. If you want to share this recipe, PLEASE provide a link back to this post.


I followed the instructions and it came out perfectly. The chicken had wonderfully crispy skin and beautifully golden brown. Thanks for a great recipe!
Thank you, Martha!
The chicken was tender and flavorful. My 6 yr old twins wouldn’t stop eating!
Thank you, Lilye! -Tatiana 🙂
The crunch factor from the coating made it fantastic. My husband wants more!! This is going to be repeated often!
I am happy to hear that Daisy! I am glad you liked this chicken recipe. Thank you so much for taking the time to leave a review, I really appreciate it! Tatiana 🙂
This is such an easy and delicious recipe! Was flavorful and my husband even loved it. Will definitely be making this again!
Thank you Annie!
This is so delicious and easy to prepare! My husbands new go to dish!
That’s great to hear Lucille! I’m glad your husband enjoyed this dish and it’s now his go-to. Thank you for sharing your experience!
I utterly loved the crispy texture and my family devoured it. Thank you for the recipe!
I’m glad to hear that you and your family enjoyed it so much. The crispy texture is definitely one of the best parts of this dish. Thanks for taking the time to share your experience and I hope you get to enjoy this recipe again soon.