Learn how to start a food blog!Starting a food blog is a great way to share your passion for cooking, while making a little money on the side! Unfortunately for many cooks the technical aspects of starting a food blog can be overwhelming, but we’ve put together this handy guide to help get you started.
Before you begin, you need to decide whether to hire a professional web designer to design your blog for you, or if you want to do it yourself. Hiring out the work is easier on you, but it’ll be expensive! Learning to design your own site can be time-consuming, but it’s much cheaper, and means you’re able to address any issues that might arise later on your own.
If you want to design your own food blog, you can use the handy guide we’ve put together below. It’s much cheaper to just host your blog yourself and buy a theme.
How To Start Your Own Food Blog
Let’s break it down!
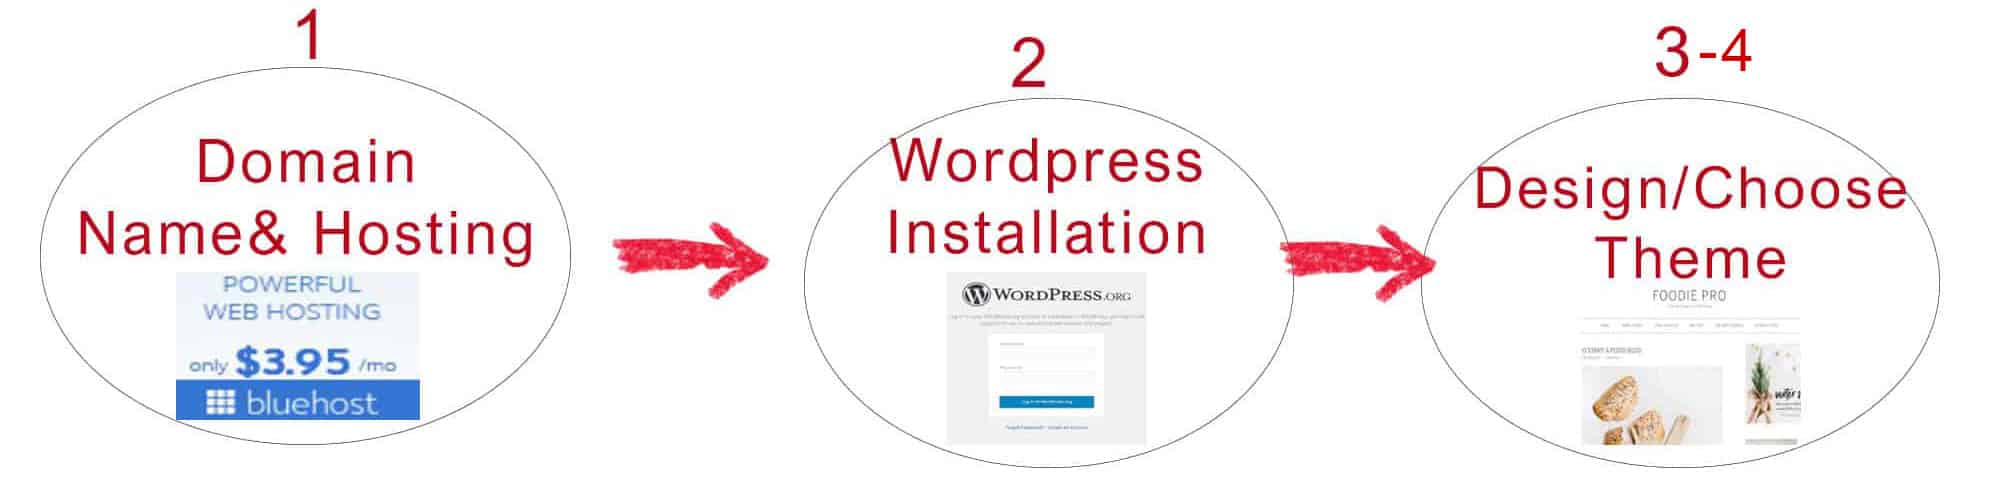
STEP 1.👩💻Name Your Blog and Purchase the Domain Name
To start with, you’ll need to name your blog. You want your food blog’s name to be descriptive, memorable, short, and easy to spell. A great way to get started with this is brainstorming the things you love about food, and some unique things about you. Where you live, your own background, and maybe even your own name are great options.
Make yourself a shortlist of 5-10 names you like, and then check if they’re taken. You don’t want to start a blog only to find out later that the name already belonged to someone else!
Check out bluehost’s domain checker below to see which of your names are available. You want to use the .com suffix, as that’s the most common.
Once you’ve chosen your domain, you can purchase it from bluehost! You’ll want to buy your name as soon as possible to make sure nobody else does.
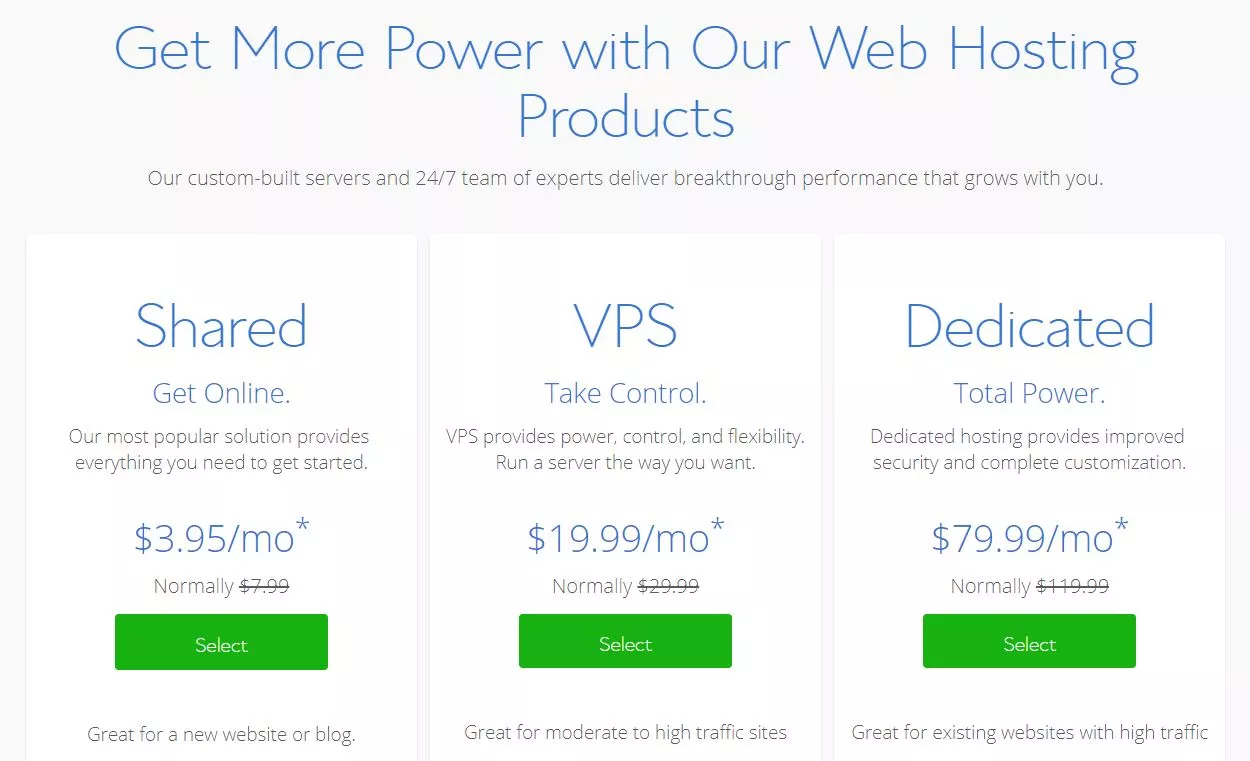
STEP 2.💻Decide on a Reliable Web Host
Hosting might sound complicated, but this is very important. You need a reliable host to make sure your website stays up! You’ll also want automatic WordPress installation.

⭐️Bluehost is great for beginners, as it’s affordable, reliable, and easy to set up! Their starter plan will only set you back $2.95 a month and offer a free domain name.
You’ll need to pay for your plan up front, but don’t worry. You can cancel within thirty days and receive a refund!
You’ll want to start with Bluehost’s basic plan, and choose the term of the plan. You’ll want at least a year to start with, if not more. If you want to blog long-term, go ahead and get a longer plan.
There are a few add-ons available, including domain privacy protection, and you can choose these as you go if you like.
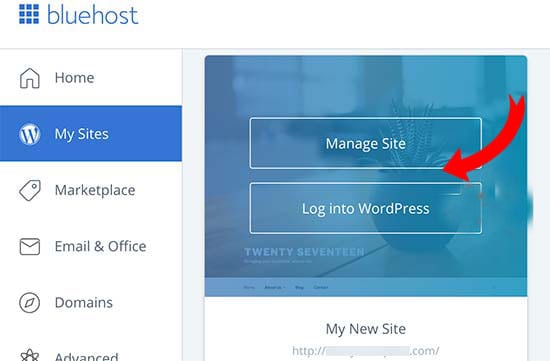
STEP 3. 👩💻Install WordPress
WordPress is how you’ll use the back end of your website, upload blog posts, and decide on a theme. Installing it is really simple! Your Bluehost plan should automatically install WordPress for you.
After logging in, go to Settings, then Permalink Settings, so you can update your permalink structure to “post name”. Once you’ve hit save, we can start on the fun stuff: building your beautiful food blog!
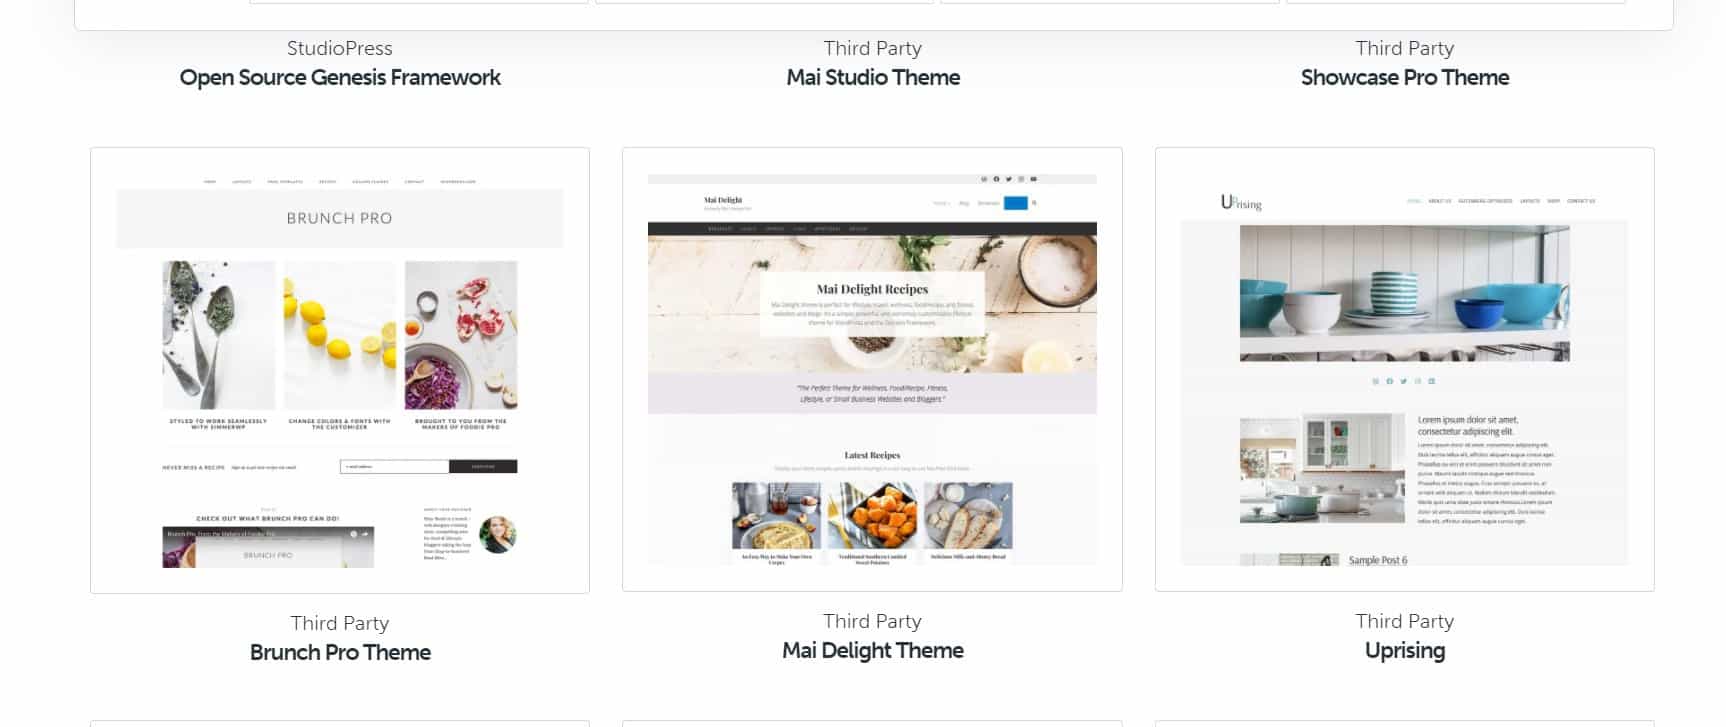
STEP 4.👉Installing A WordPress Theme
WordPress Themes are there to determine the overall vibe and brand of your site. Be sure to pick one that really captures your aesthetic and taste.
What does a great WordPress theme look like? They should be:
- Well designed by an expert. It needs to offer any features you want and be accurate to your vision for the food blog.
- Responsive. You want your site visitor experience to be as positive as possible, regardless of their viewing device. That means it should be optimized for mobile, tablet, or on a computer.
- Search Engine Optimized. Google is like the index of the internet, and if your site isn’t built to accommodate it, you won’t get any visitors! Make sure your design is appropriately coded for searches. You can run the URL through this validation service to determine its optimization.
- User Friendliness. Make sure your theme offers easy design options for you so you don’t have to mess around with the code if you want to change anything. You want it to be really easy to change things like pictures, posts, and colors.
- Site support. Make sure there’s a crack team of experts who can help you if things go wrong!
Free themes exist, but the old adage applies here. If it’s good, it won’t be cheap, and if it’s cheap, it won’t be good. You can spend money to save money by forking out for a premium theme and avoid having to make costly changes to your site later on. Studiopress has good WordPress themes for food bloggers.
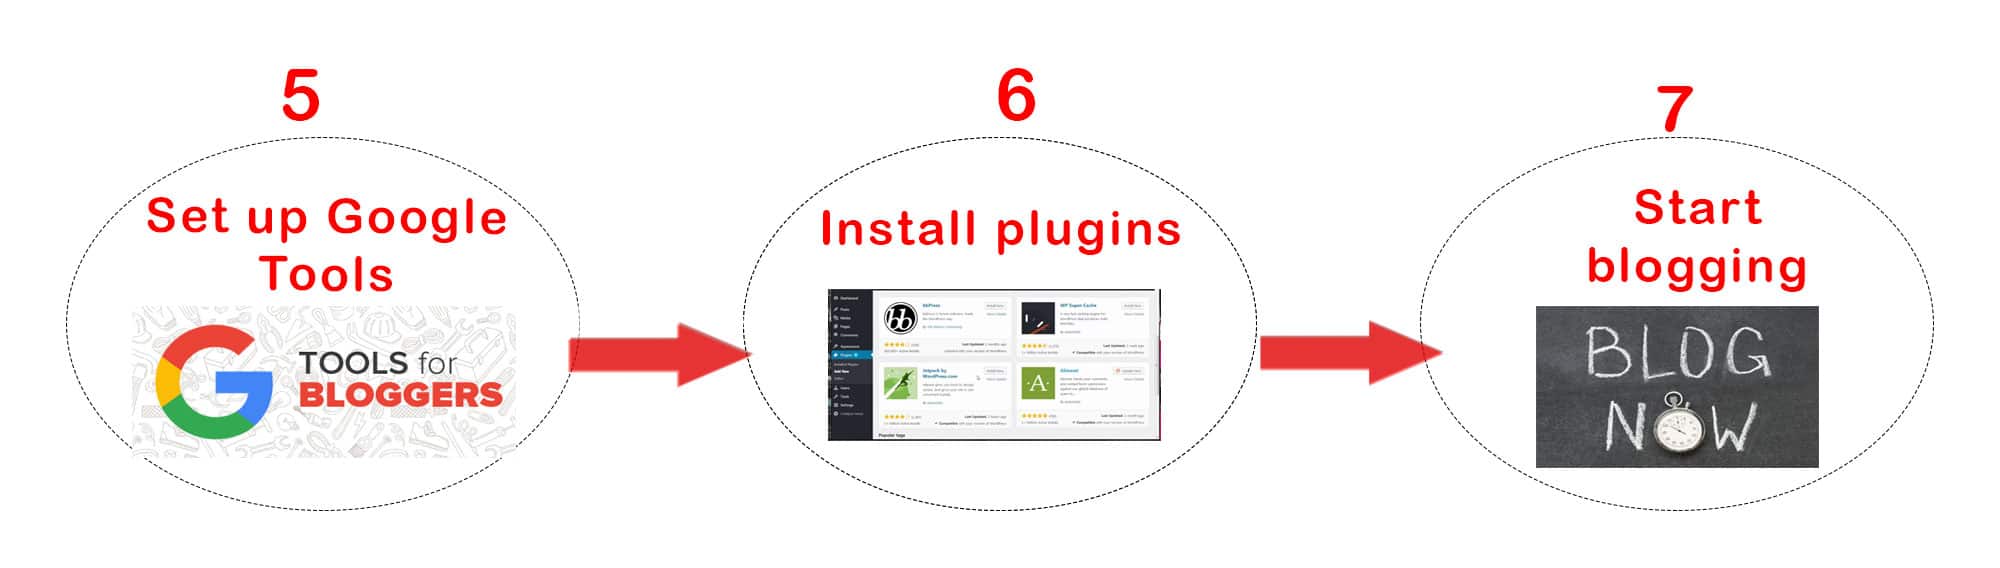
STEP 5.💡Set Up Google Tools
Create a Gmail account for your blog. If you already have one, you can use it, but it’ll make life easier to separate them. You’ll need a Google account to use the tools below.
After you’ve set up your Google account, ensure you set up Google Analytics and Google Search Console. Analytics will help you track the traffic for your blog, while console will ensure that your website is up and running. For both you’ll need to install the tracking code, which you’ll find in your Yoast SEO plugin settings.
STEP 6.🔌Install WordPress Plugins
WordPress plugins will help your blog to thrive! You’ll want to use the following:
- Akismet to filter out spam comments
- Tasty Recipes optimizes your recipes for search engines
- jQuery Pin It Button For Images to allow visitors to pin images from your site
- Subscribe To Comments Reloaded to ensure commenters get your replies with an email notification
- Yoast SEO: to help with SEO, as above
To install WordPress plugins, just follow the below steps.
- Go to Dashboard
- Hover over “plugins” in your sidebar
- Click “add new”
- In the “search plugins” field, search for each of the plugins by name
- Once you’ve found the plugin, click “install now”
- Configure settings as required
STEP 7.🚀Start Blogging!
Congratulations! You’ve created your food blog! You can start writing up your recipes and posting images of your delicious creations.
Good luck!


Leave a Reply