

This post may contain affiliate links. Please read our disclosure policy.
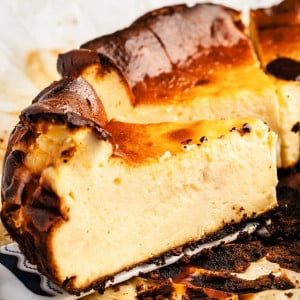
This San Sebastian Cheesecake embodies the essence of a traditional Spanish Basque cheesecake – wonderfully light, creamy, and smooth, with a perfectly caramelized top!
😍 Why you’ll Love This San Sebastian Cheesecake Recipe
- The ingredients and steps are easy, and you don’t need a water bath!
- It’s super smooth, creamy, and feels like custard.
- You can make it in a regular pan; no need for a special one with a removable bottom.
- It’s okay if it cracks or sinks a bit in the middle, which is not typical for regular cheesecakes.
If you really like cheesecake, you’ll enjoy our Easy Cheesecake Recipe, Pistachio Baklava Cheesecake or Pistachio Cheesecake.
What does San Sebastián Cheesecake Taste Like?
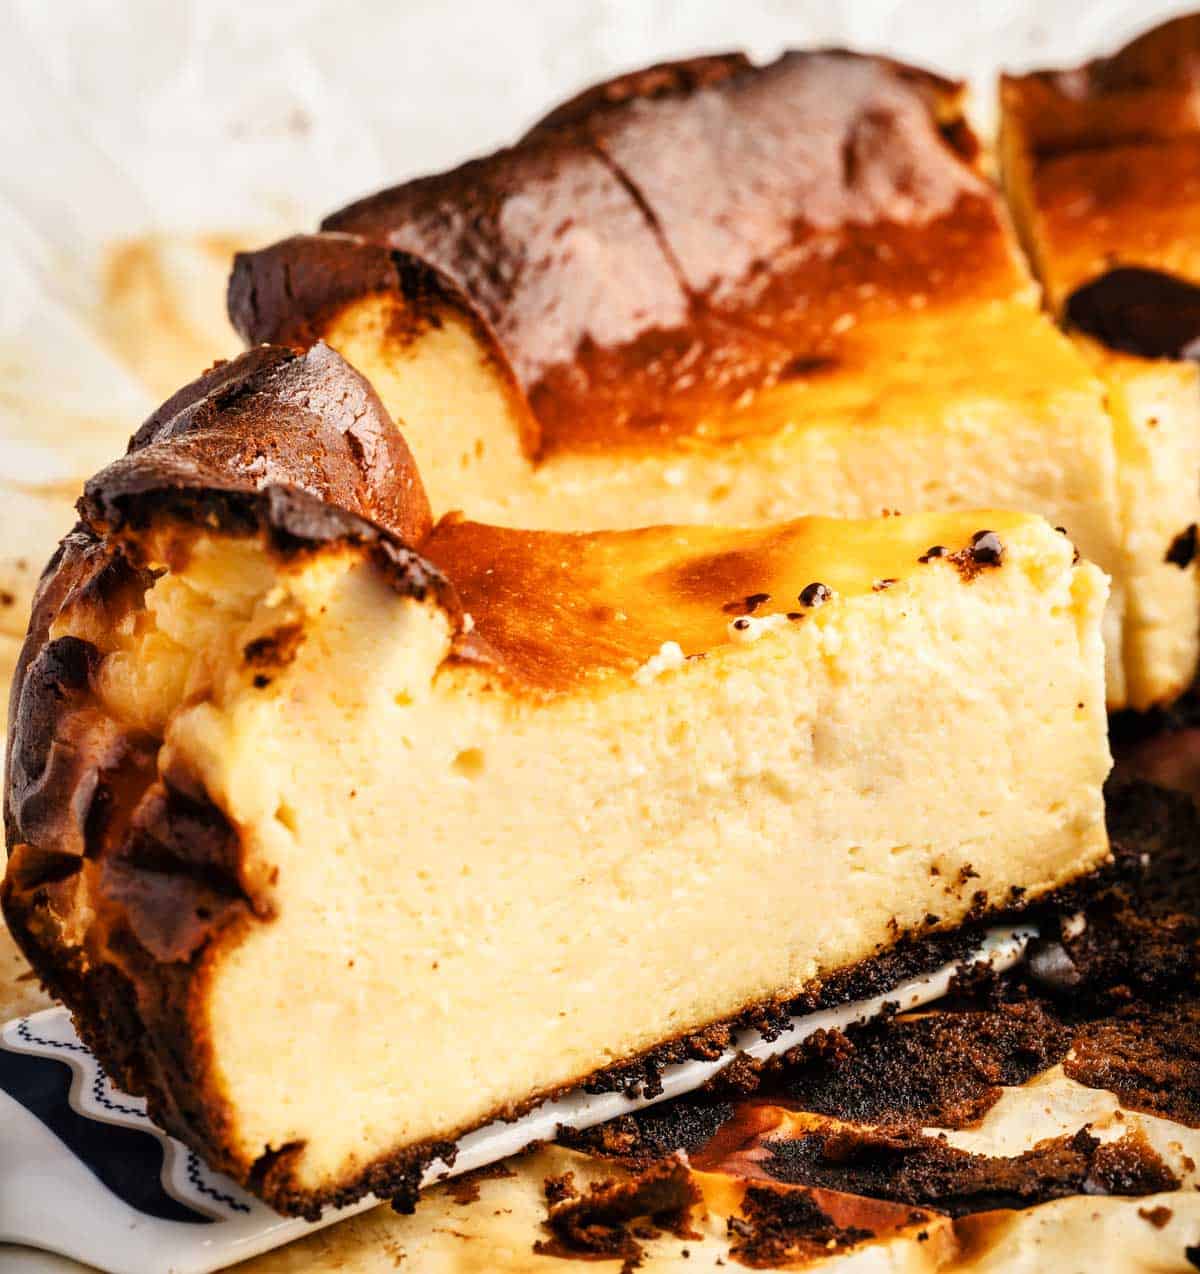
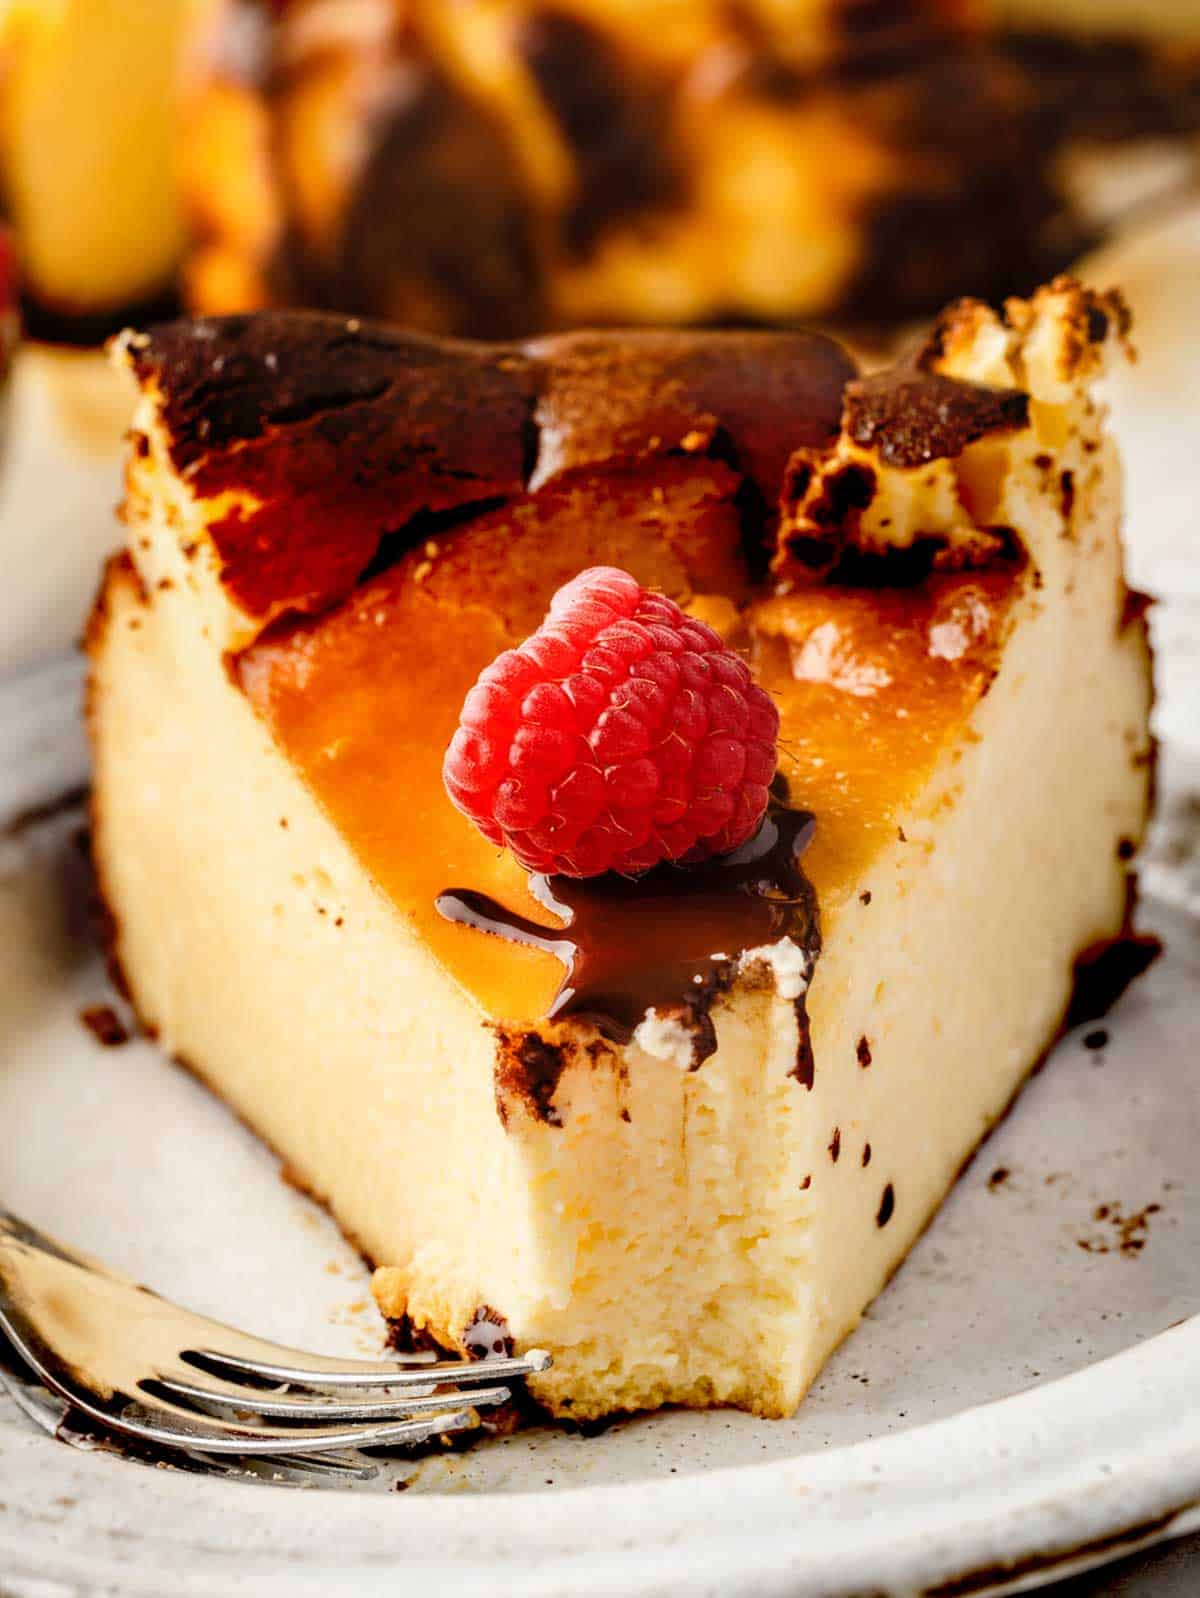
San Sebastián cheesecake, also known as Basque cheesecake, has a unique and delicious taste. It’s known for being rich, creamy, and slightly caramelized on the outside. The interior is velvety smooth with a custard-like texture. It has a pronounced cream cheese flavor, a hint of vanilla, and a subtle sweetness that’s not overly sugary. The caramelization on the top and edges gives it a delightful contrast of flavors and textures.
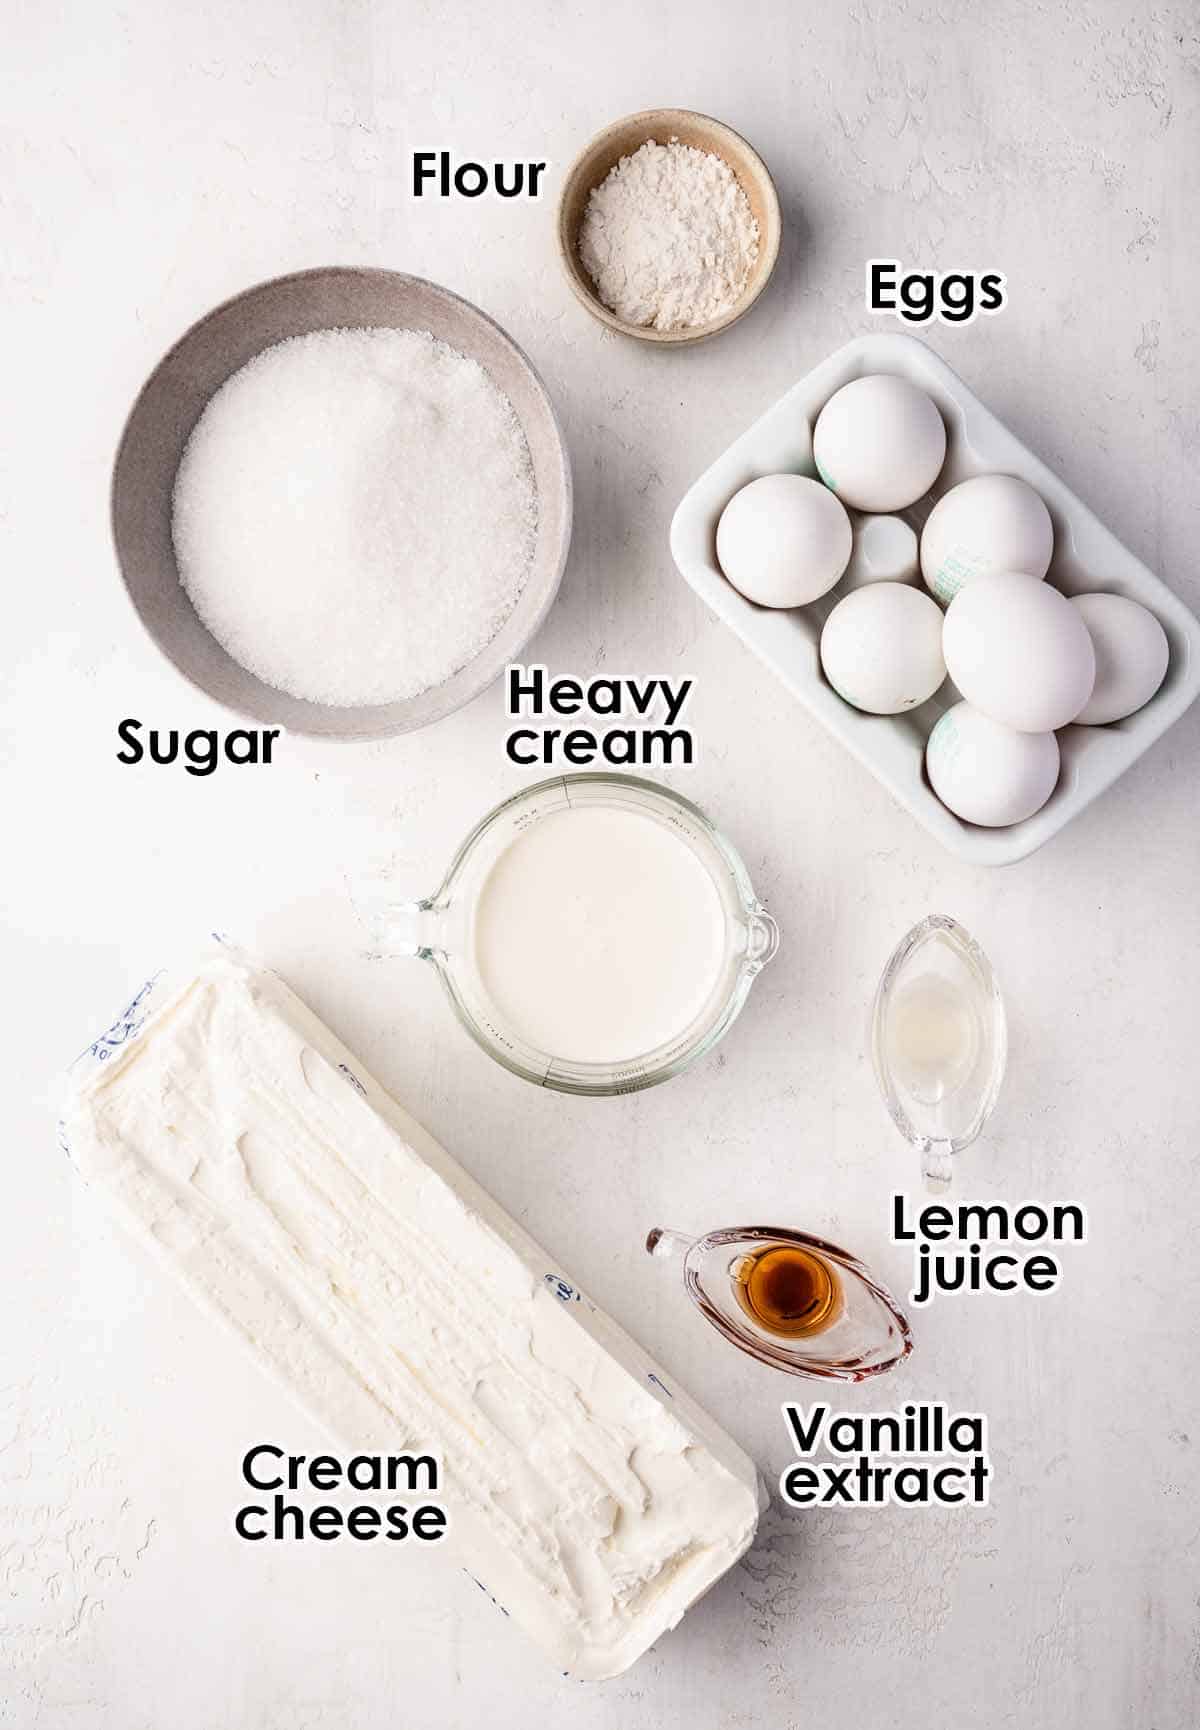
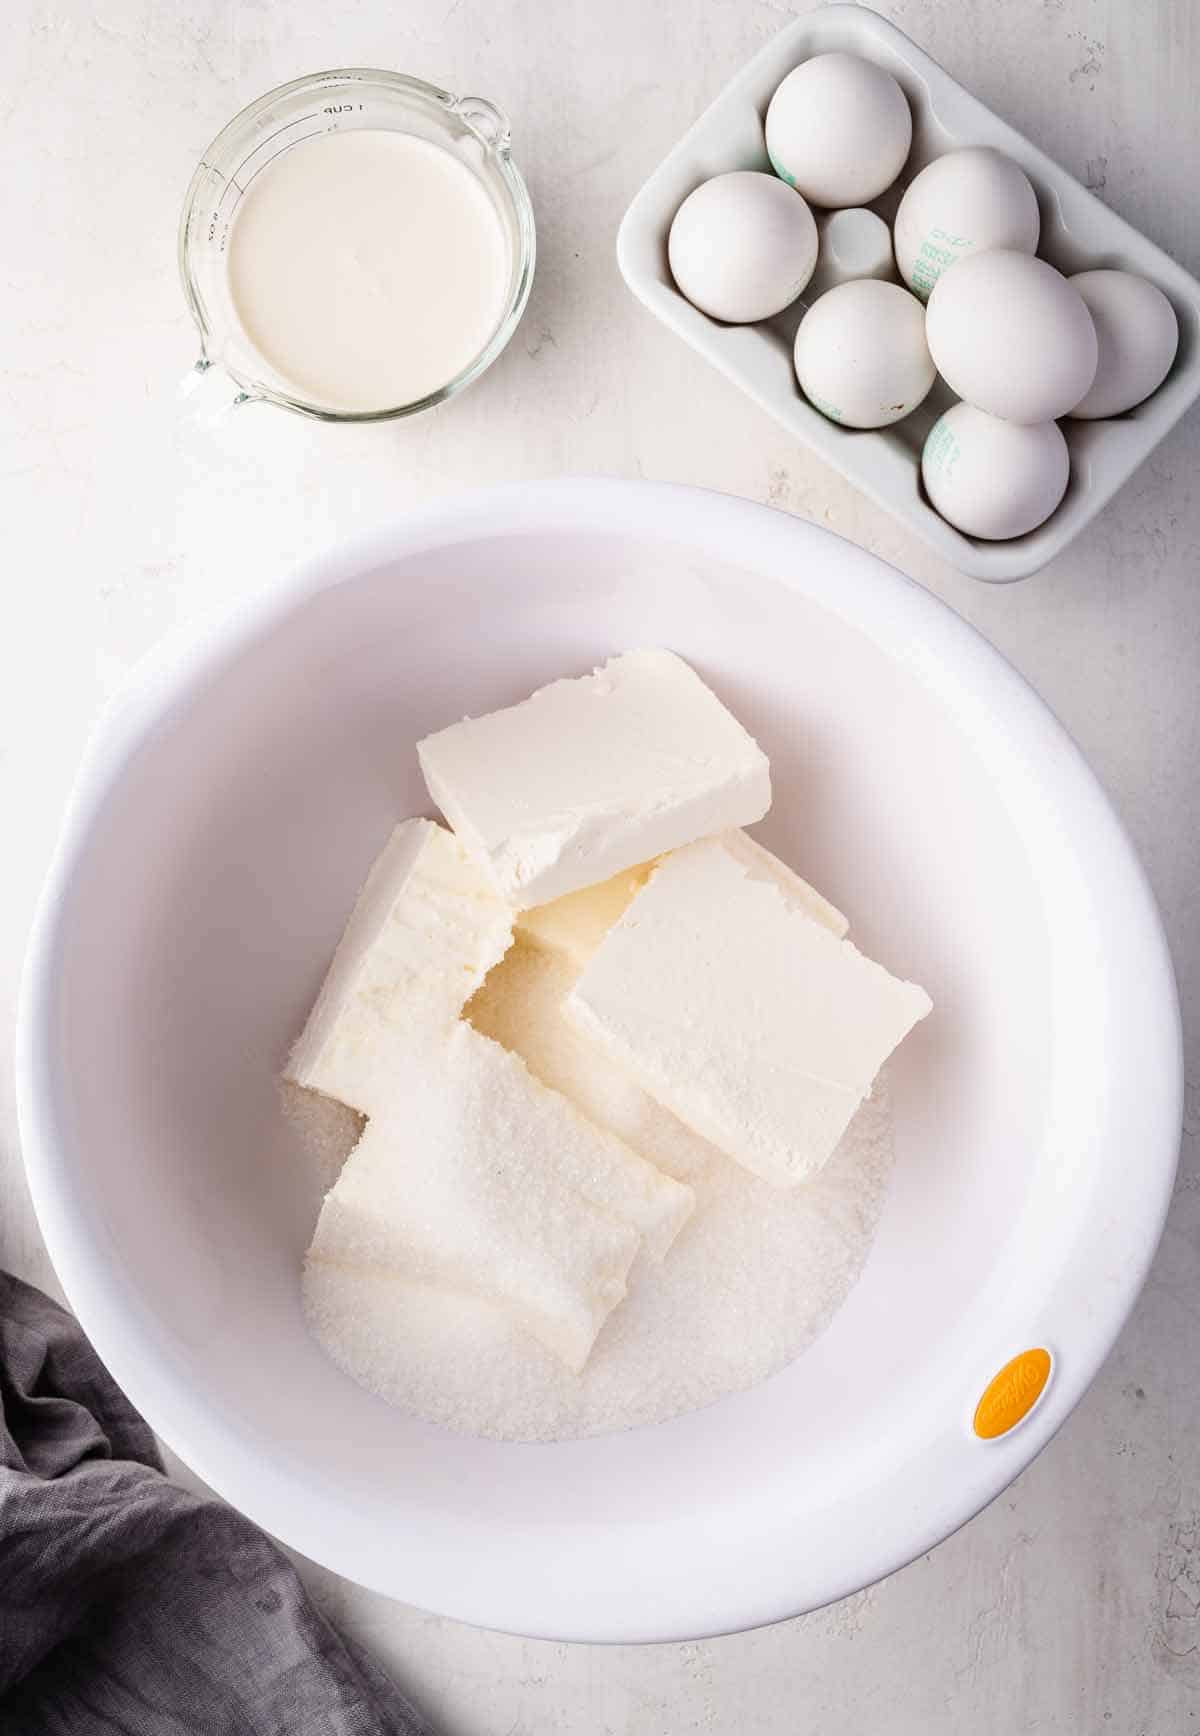
✅ You’ll Need
- Cream Cheese: Use full-fat cream cheese for the best texture and flavor. Substitution: You can use Neufchâtel cheese as a lower-fat alternative, but it may result in a slightly different texture.
- Sugar: Adjust the amount of sugar to your preferred level of sweetness. The range is usually 1 1/2 to 2 cups. Substitution: You can use granulated white sugar or superfine sugar. Brown sugar is not recommended for this recipe.
- Eggs: Use large eggs at room temperature for even mixing and better results.
- Heavy Cream: This adds richness and creaminess to the cheesecake. Substitution: Half-and-half can be used as a lighter option, but it will result in a slightly less creamy texture.
- Vanilla Extract: Adds a fantastic vanilla flavor. Substitution: Use vanilla bean paste or the seeds from a vanilla bean for a more intense vanilla flavor.
- Lemon Juice: Provides a subtle citrusy brightness that complements the richness of the cheesecake. Substitution: Freshly squeezed lime juice or orange juice can be used as a citrus alternative.
- All-Purpose Flour: Helps with the structure of the cheesecake. Substitution: You can use cake flour or a gluten-free alternative, but it may slightly affect the texture.
🔪 How to Make San Sebastian Cheesecake (Basque Cheesecake)
Put a rack in the middle of your oven. Preheat your oven to 400 degrees Fahrenheit (about 200 degrees Celsius).
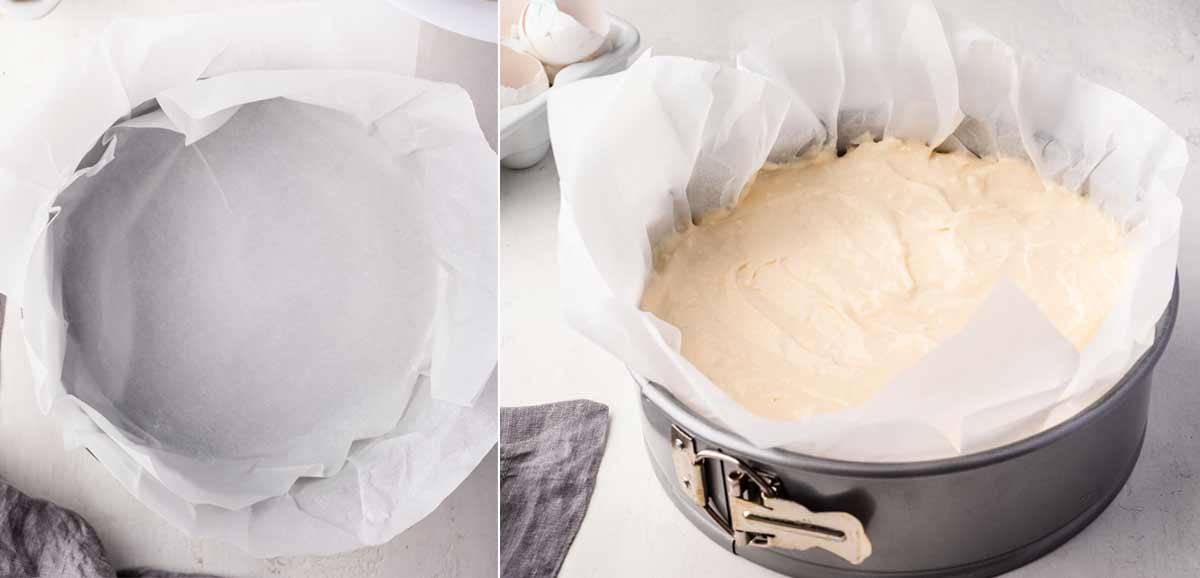
Line a 10-inch (25 cm) springform pan or round baking pan with wax or parchment paper.
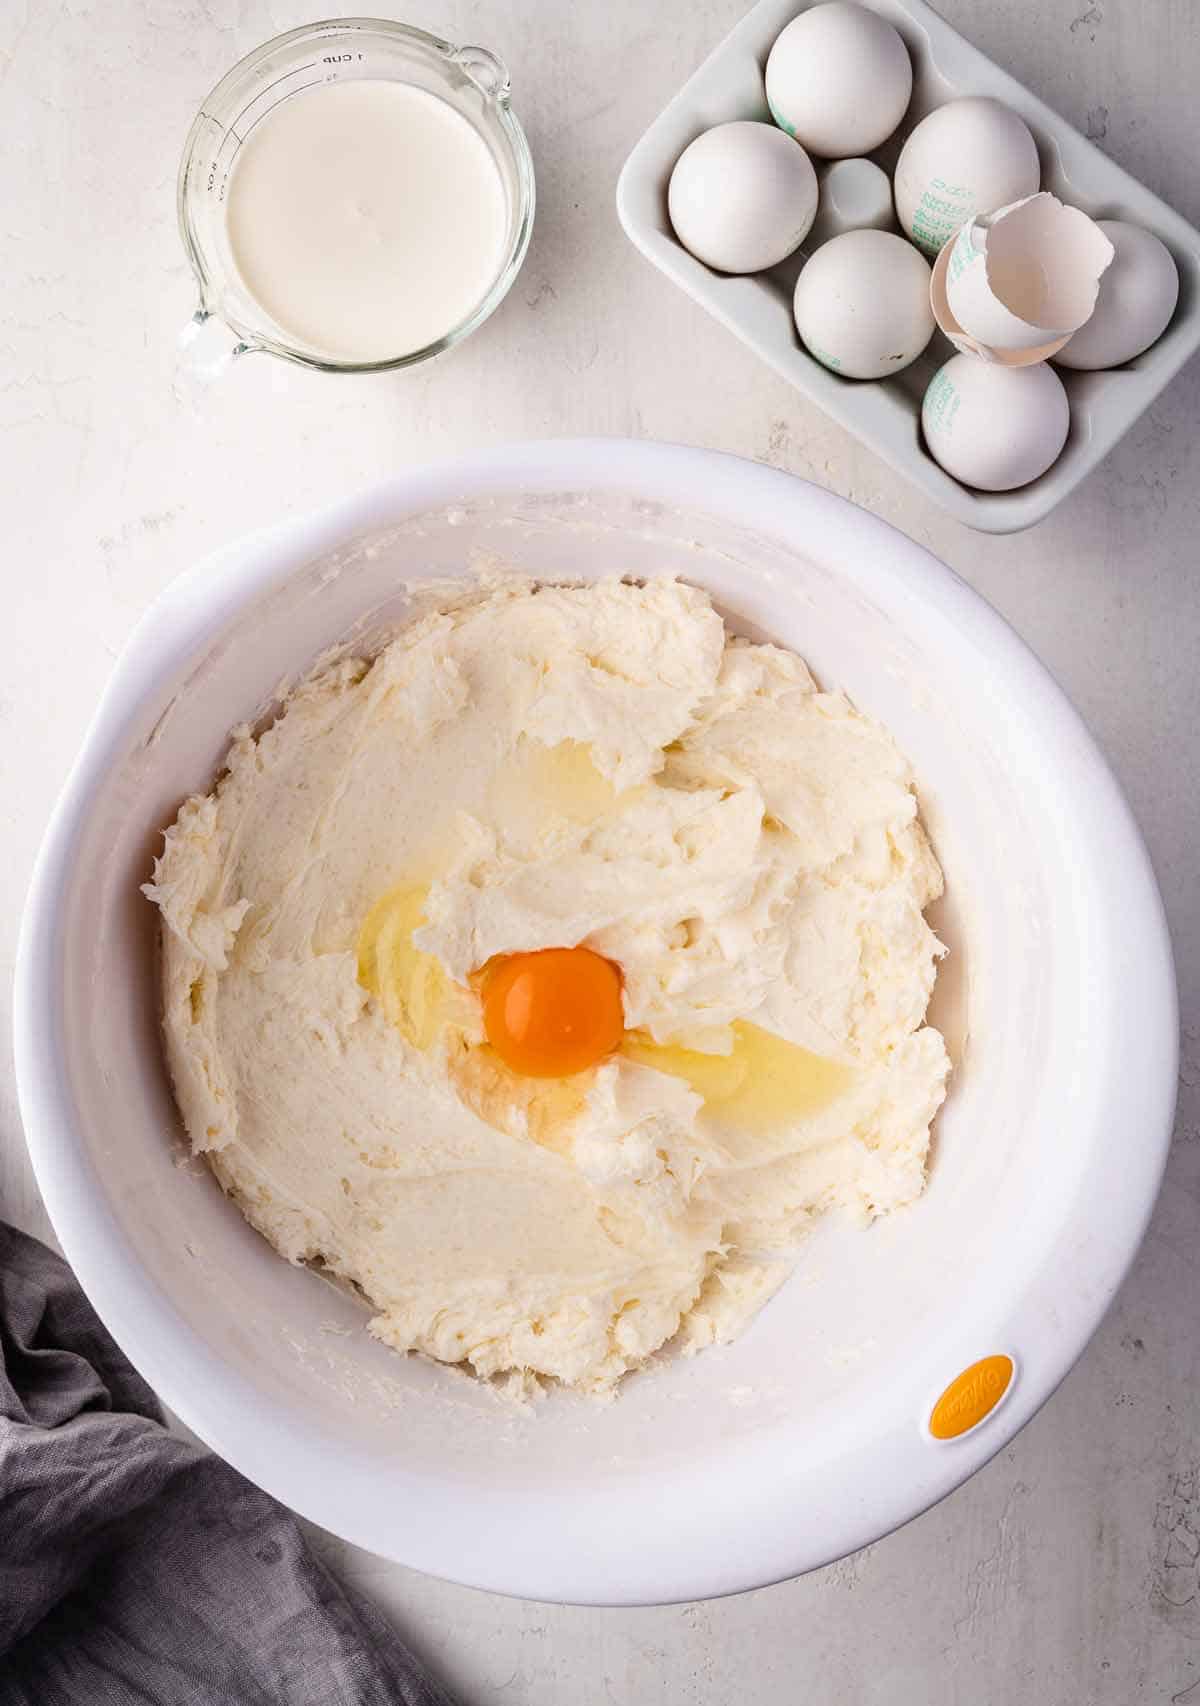
Mix the sugar and cream cheese together until they become smooth and well blended. You can use an electric mixer, a whisk, or even a metal spoon (just like they do at La Viña).
Now, one by one, add the eggs to the mixture and beat after each addition until they are completely mixed in.
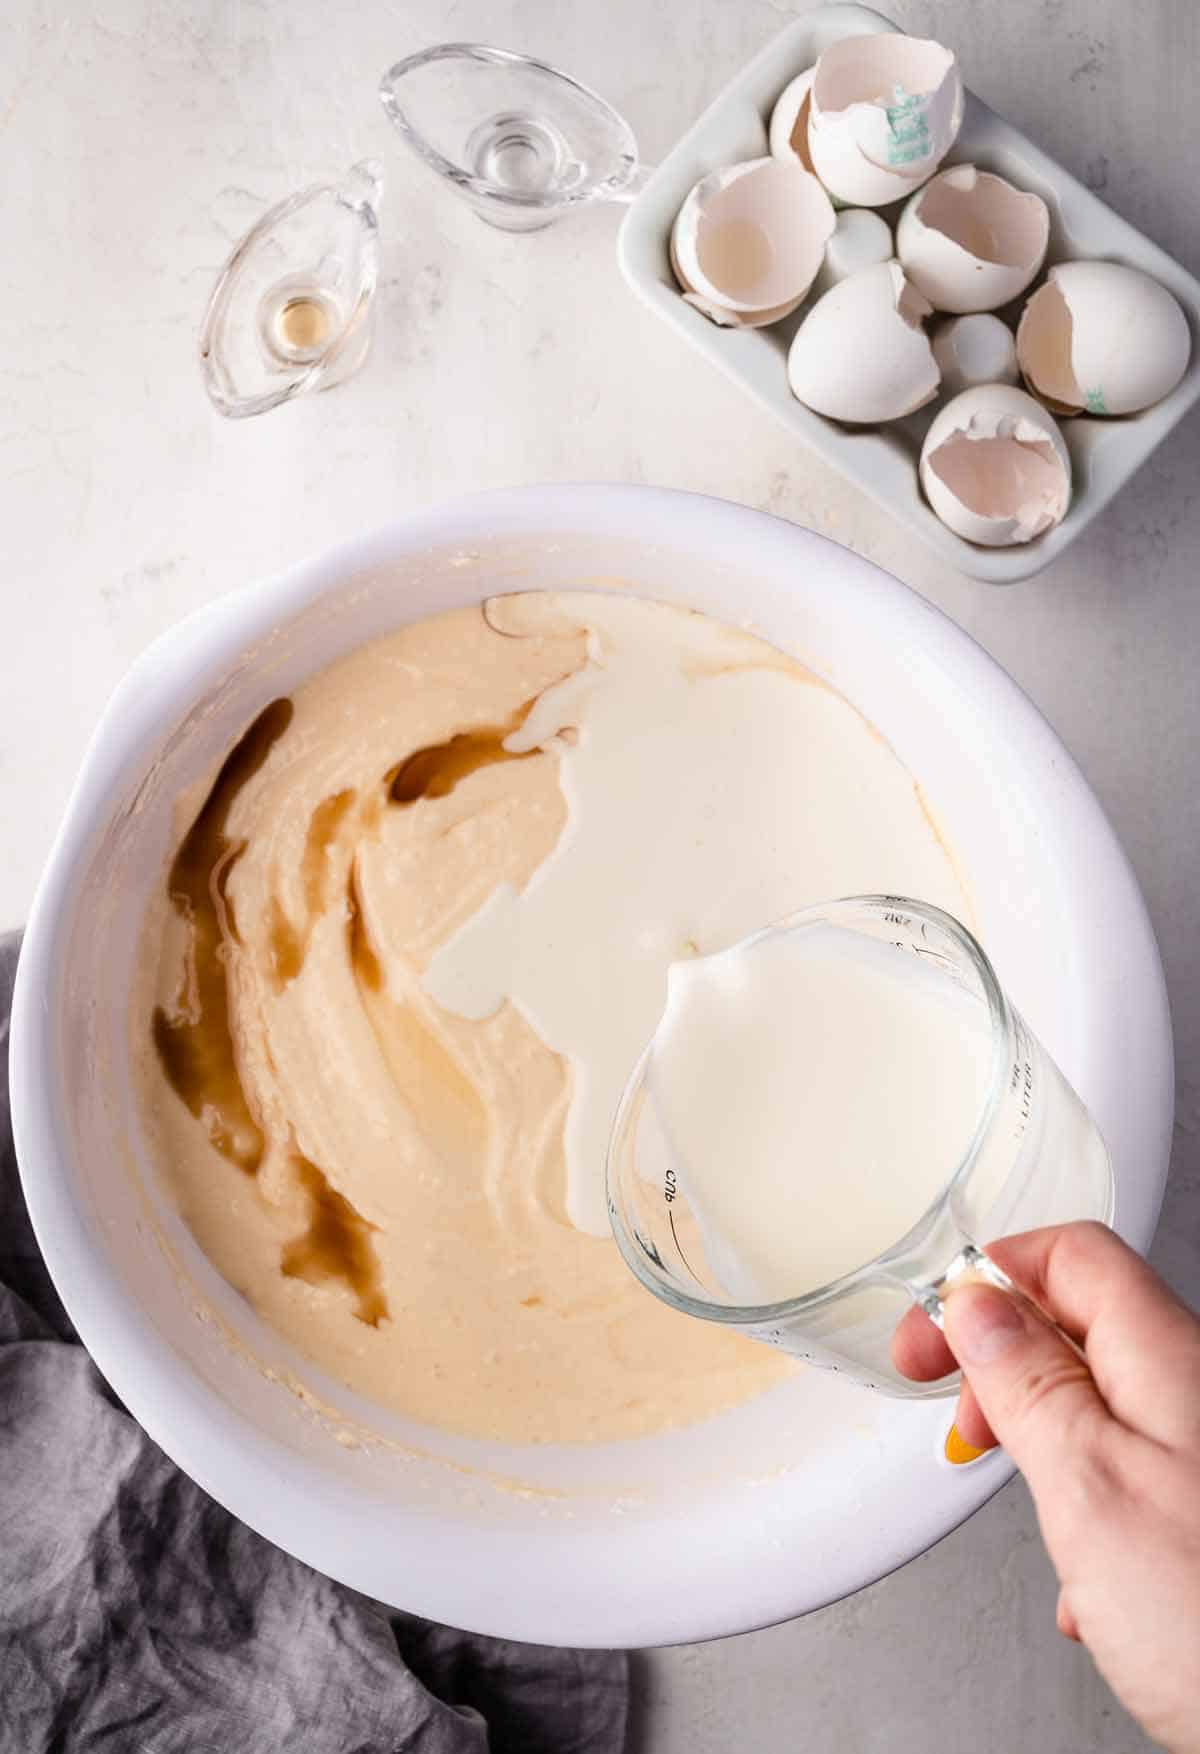
Next, add the heavy cream, vanilla extract, and lemon juice to the mixture. Stir or mix them in until everything is well combined.
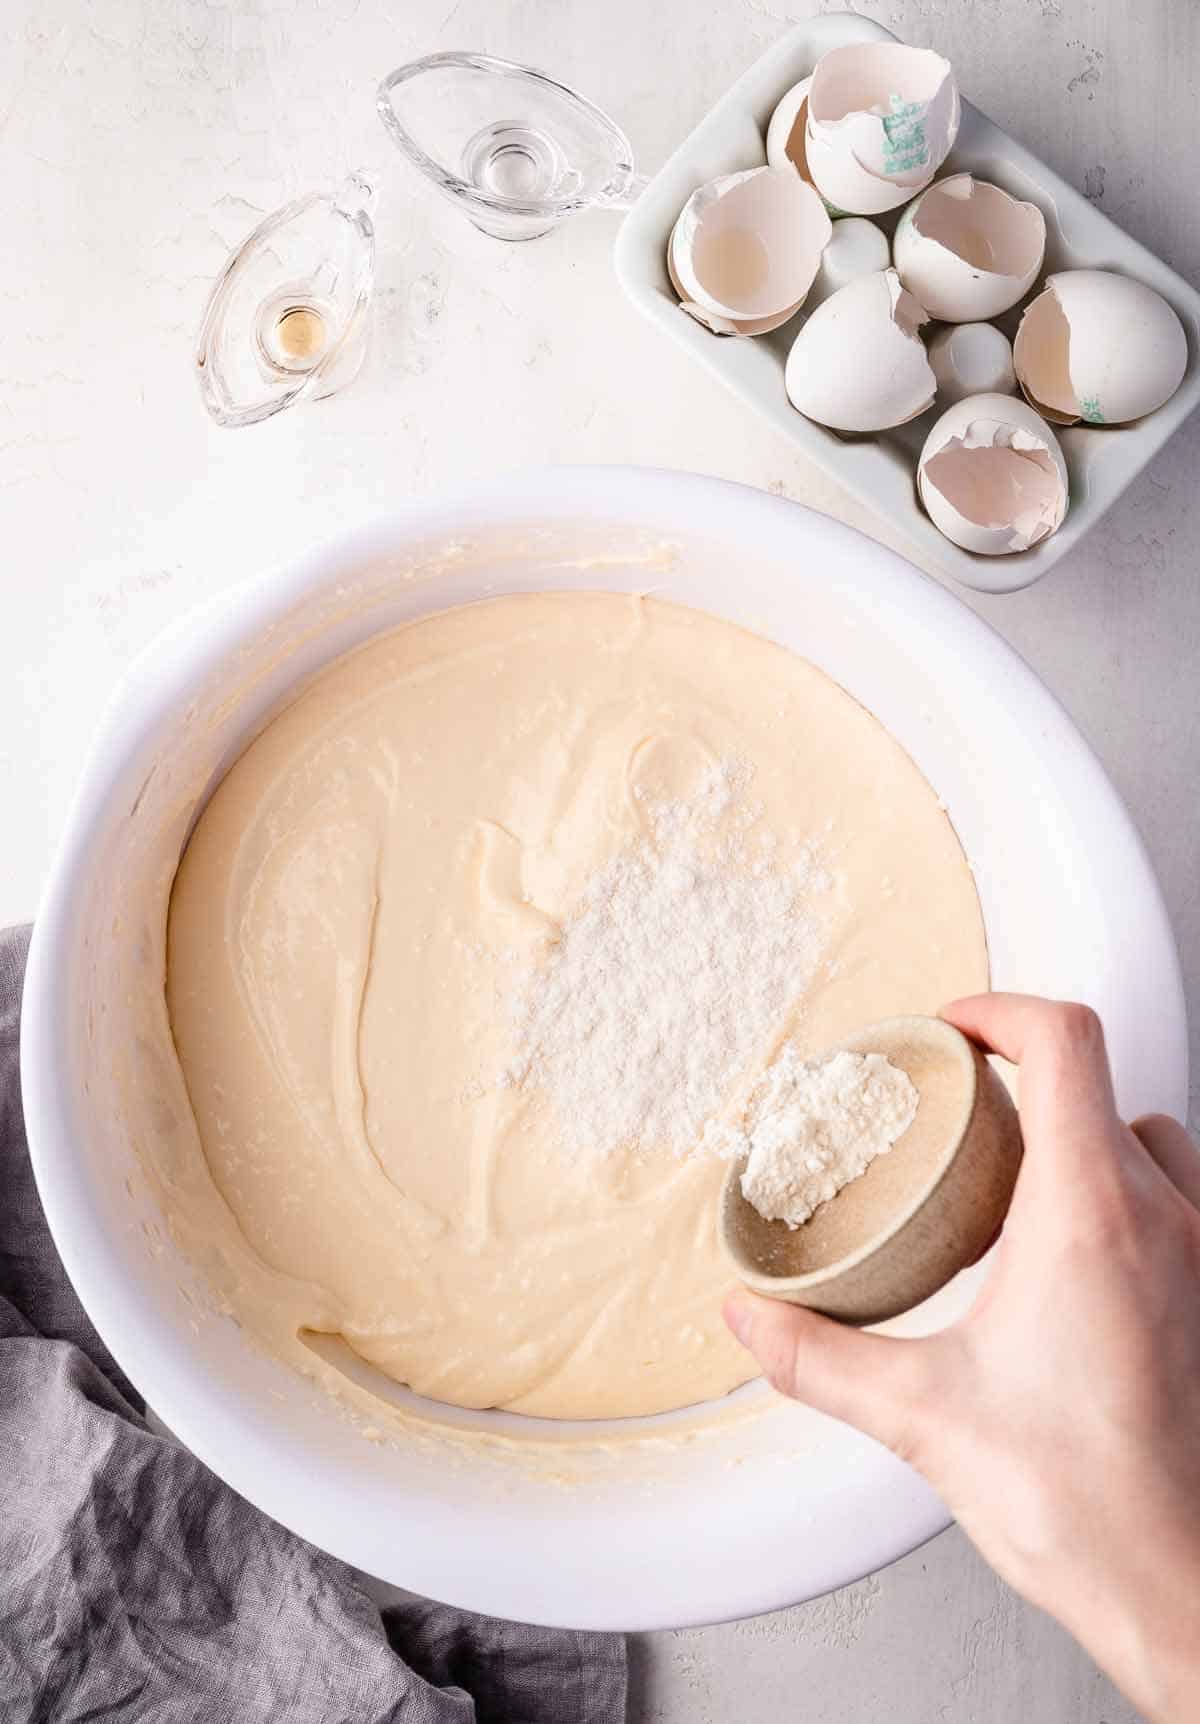
Add the flour to the mixture, and gently mix it in.
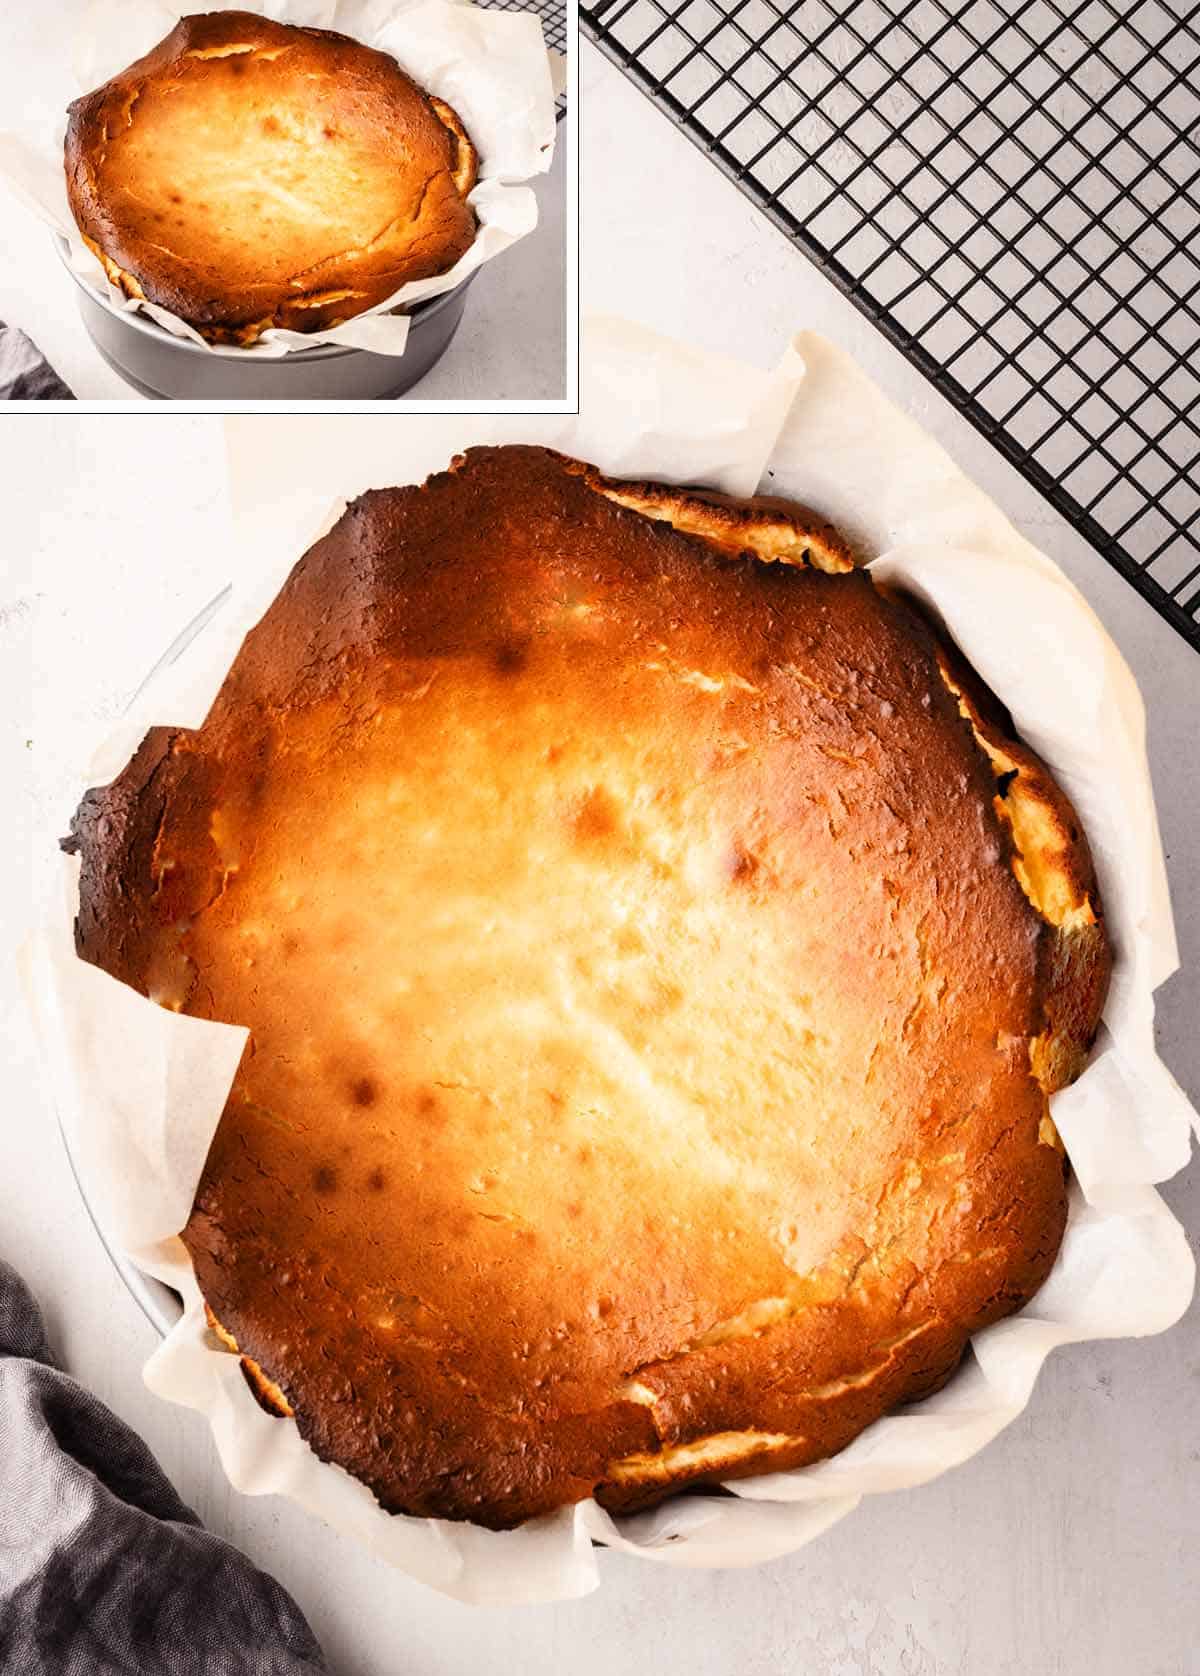
Pour the cheesecake batter into the pan you prepared earlier. Bake it in the oven until it turns brown and gets almost burnt on top, which should take around 35 to 50 minutes. Don’t worry if the center still seems a bit shaky when you take it out of the oven.
Once it’s done, take the cake out of the oven and let it cool down completely on a cooling rack. You might notice that it has risen a lot, maybe even higher than the top of the pan. But as it cools, it will sink in the middle.
We prefer the center to be very soft, so we usually take it out after about 35-40 minutes of baking.
👨🍳 Expert Tips For San Sebastian Cheesecake
- Higher Baking Temperature: This cheesecake is baked at a higher temperature than usual. We used 400°F in a convection oven because we found that the rotating heat from the fan helps brown the top of the cheesecake nicely.
- Use an Oven Thermometer: Convection ovens typically adjust the temperature to be 25°F lower than what you set. To ensure accuracy, it’s essential to have an oven thermometer.
- Adjust Browning: If the top of your cheesecake hasn’t browned enough by 42-44 minutes, you can switch on the broil function for the last 1-2 minutes to achieve the desired browning.
- Cooling Process: After baking, allow the cheesecake to cool at room temperature for a couple of hours. Then, refrigerate it until it’s completely cooled and feels firm to the touch.
How to Know When The Cheesecake is Done Baking?
Knowing when the San Sebastian Cheesecake is done baking is essential for achieving the right texture. Here’s how to determine when it’s ready:
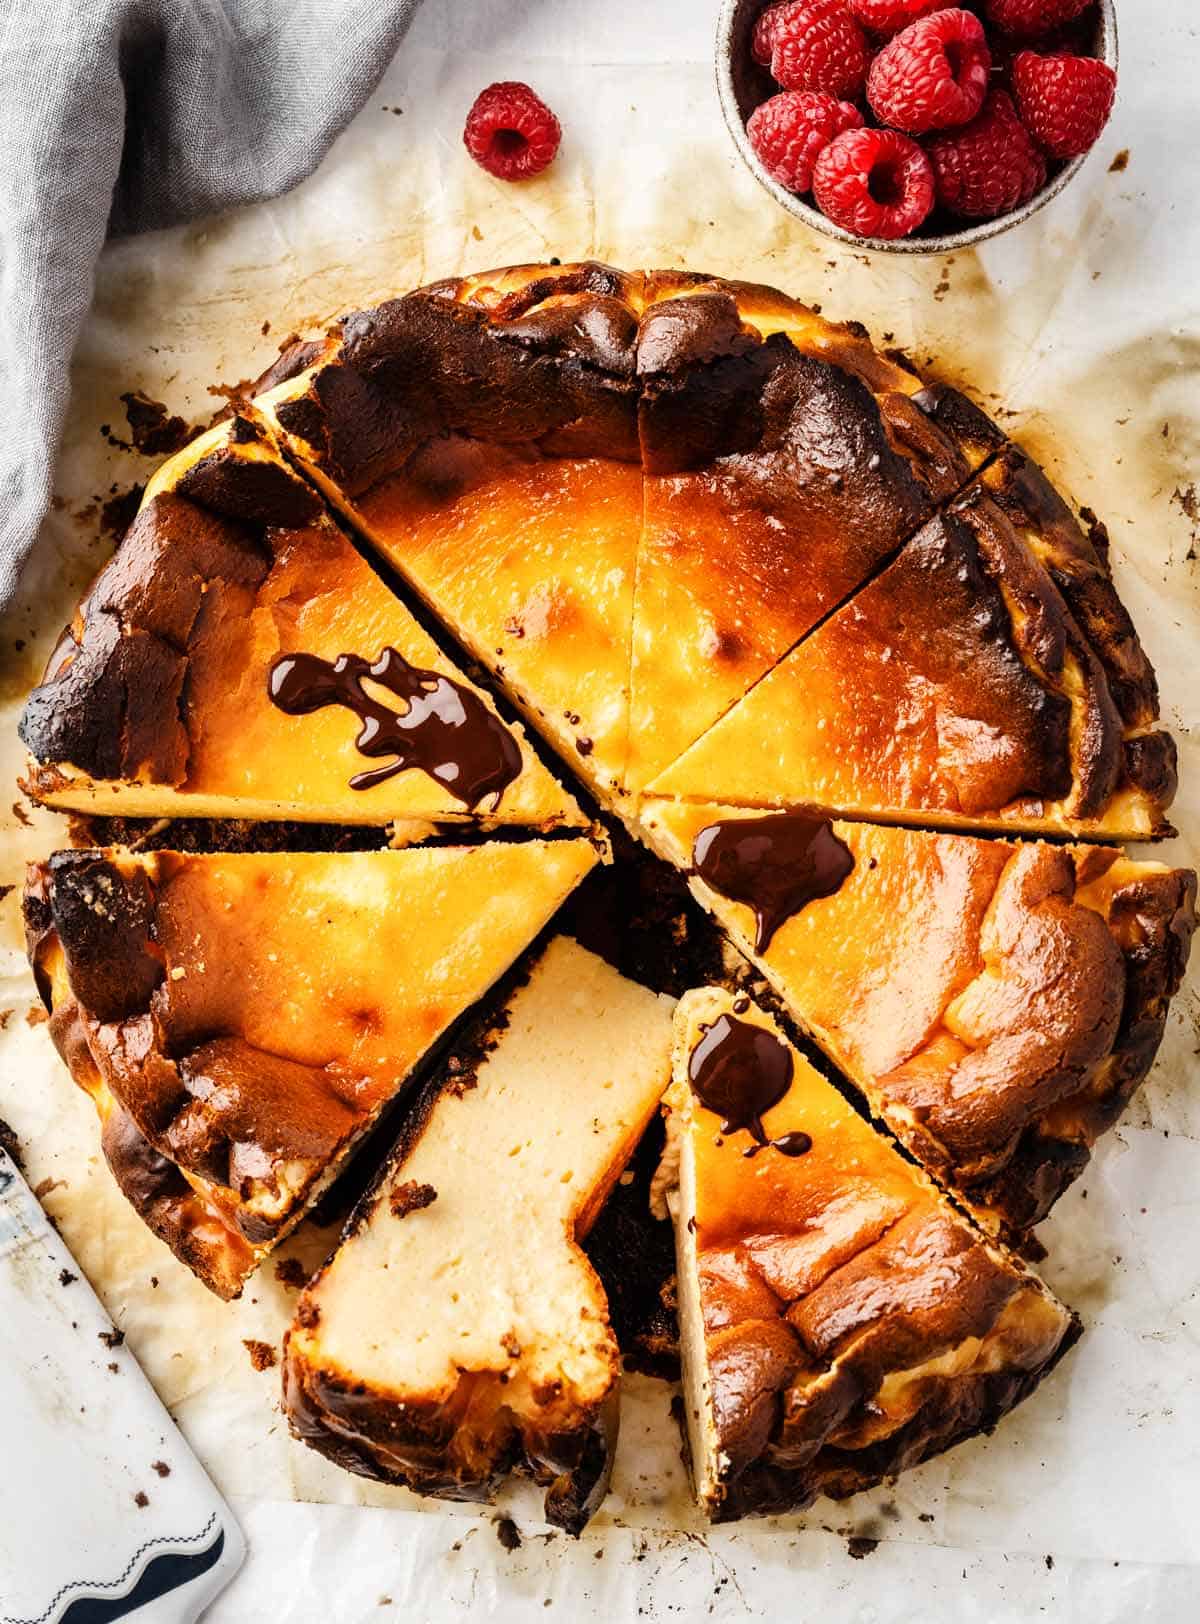
- Browning: The top of the cheesecake should be browned and even slightly burnt in spots. This characteristic caramelization is a signature of the San Sebastian Cheesecake.
- Slight Wobble: When you gently shake the pan, the center of the cheesecake should have a slight wobble or jiggle. It’s normal for it not to be fully set at this stage.
- Time: The recommended baking time is usually between 35 to 50 minutes at 400°F (204°C). However, the exact time may vary depending on your oven and the specific conditions. Some prefer to take it out earlier for a softer center, while others bake it longer for a firmer texture.
- Broiling (Optional): If the top hasn’t browned sufficiently by the recommended time, you can briefly switch on the broil function for the last 1-2 minutes, but keep a close eye on it to prevent burning.
❗The center of the cheesecake will continue to set as it cools, so don’t be alarmed if it appears slightly undercooked when you take it out of the oven. The final texture should be creamy and custard-like in the center with a beautifully caramelized top and edges.
🗄️ Storage
Refrigeration:
- Cover the cheesecake with foil or plastic wrap.
- Place it in the refrigerator, where it can be stored for up to a week.
Freezing the Whole Cheesecake:
- Wrap the entire cheesecake in plastic wrap.
- Then, wrap it again with aluminum foil or place it in an airtight container that’s big enough to hold it.
- Properly sealed, it can be frozen for 3 months.
Freezing Slices:
- For individual slices, tightly pack them in an airtight container.
- Place the container inside a freezer bag, squeezing out excess air to prevent freezer burn.
- When you’re ready to enjoy a slice, you can thaw it in the refrigerator overnight or bring it to room temperature for a few hours before serving.
More Cheesecake Recipes

If you make this recipe be sure to leave a comment or give this recipe a rating ⭐⭐⭐⭐⭐! I will be happy to hear from you!

San Sebastian Cheesecake (Basque Cheesecake)
Ingredients
San Sebastian Cheesecake
- 36 ounces cream cheese, at room temperature
- 1 1/2 cups sugar, for a slightly sweeter cheesecake use 2 cups
- 7 large eggs, at room temperature
- 3/4 cup heavy cream
- 2 teaspoons vanilla extract
- 2 teaspoons lemon juice
- 1 tablespoon all-purpose flour
Chocolate Sauce ( Optional)
- 12 ounces dark or milk chocolate
- 3/4 cup heavy cream
- 1 1/2 teaspoon vanilla extract
Instructions
- Place a rack in the middle of the oven and turn it on to 400 degrees to preheat. Line a 10-inch (25 cm) springform or round baking pan with wax or parchment paper. Ensure the paper extends beyond the edges of the pan; this will help with easy cheesecake removal and prevent sticking. Helpful tip: Make the parchment paper wet, then squeeze out the water and pat it dry. Now, it’s flexible and can fit your pan without needing lots of cuts or layers.
- Using an electric mixer, a whisk, or even a metal spoon (like they do at La Viña), cream the sugar and cream cheese until smooth.
- Add the eggs one at a time and beat until they are completely incorporated.
- Add the heavy cream, vanilla and lemon juice, and mix it in.
- Add in the flour and gently mix it in on low speed or by hand.
- Pour the batter into the prepared pan and bake until browned and almost burnt on top, 35 to 50 minutes. The center will still be a bit wobbly when you take it out of the oven. Once it’s done, remove the cake from the oven and let it cool completely on a cooling rack. It will have risen quite a bit, possibly even above the top of the pan, but as it cools, it will sink in the middle. We like the center to be very soft, so we take it out at the 35-minute mark.
- About an hour later, transfer the cake to the refrigerator to let it cool completely. After it has spent a few hours in the fridge (or even better, overnight), it should be cold enough to slice. Don’t remove the parchment paper until you’re ready to cut it. Removing it too early can cause it to lose its shape.
Chocolate Sauce ( Optional)
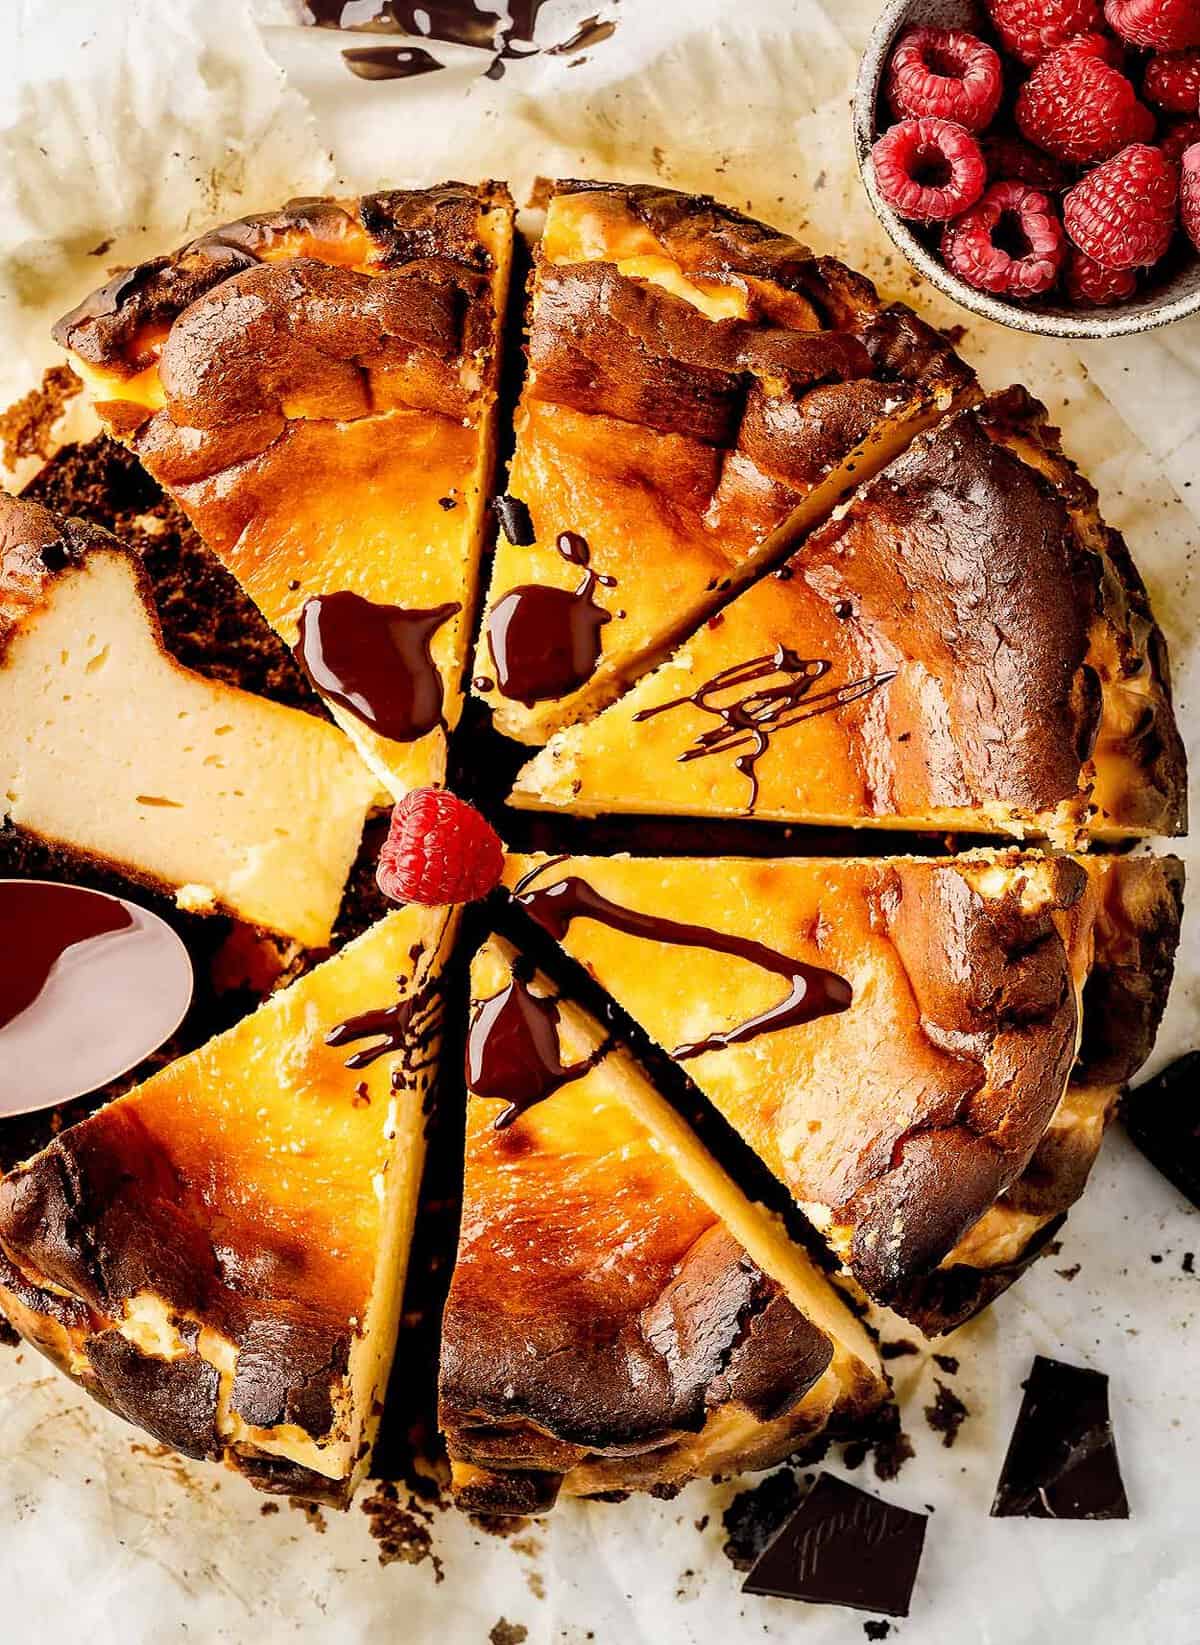
- Before serving, make the chocolate sauce. Put the chocolate and cream in a microwave-safe bowl, then microwave it, stirring every 45 seconds until it’s fully melted. Add the vanilla and give it a good stir.
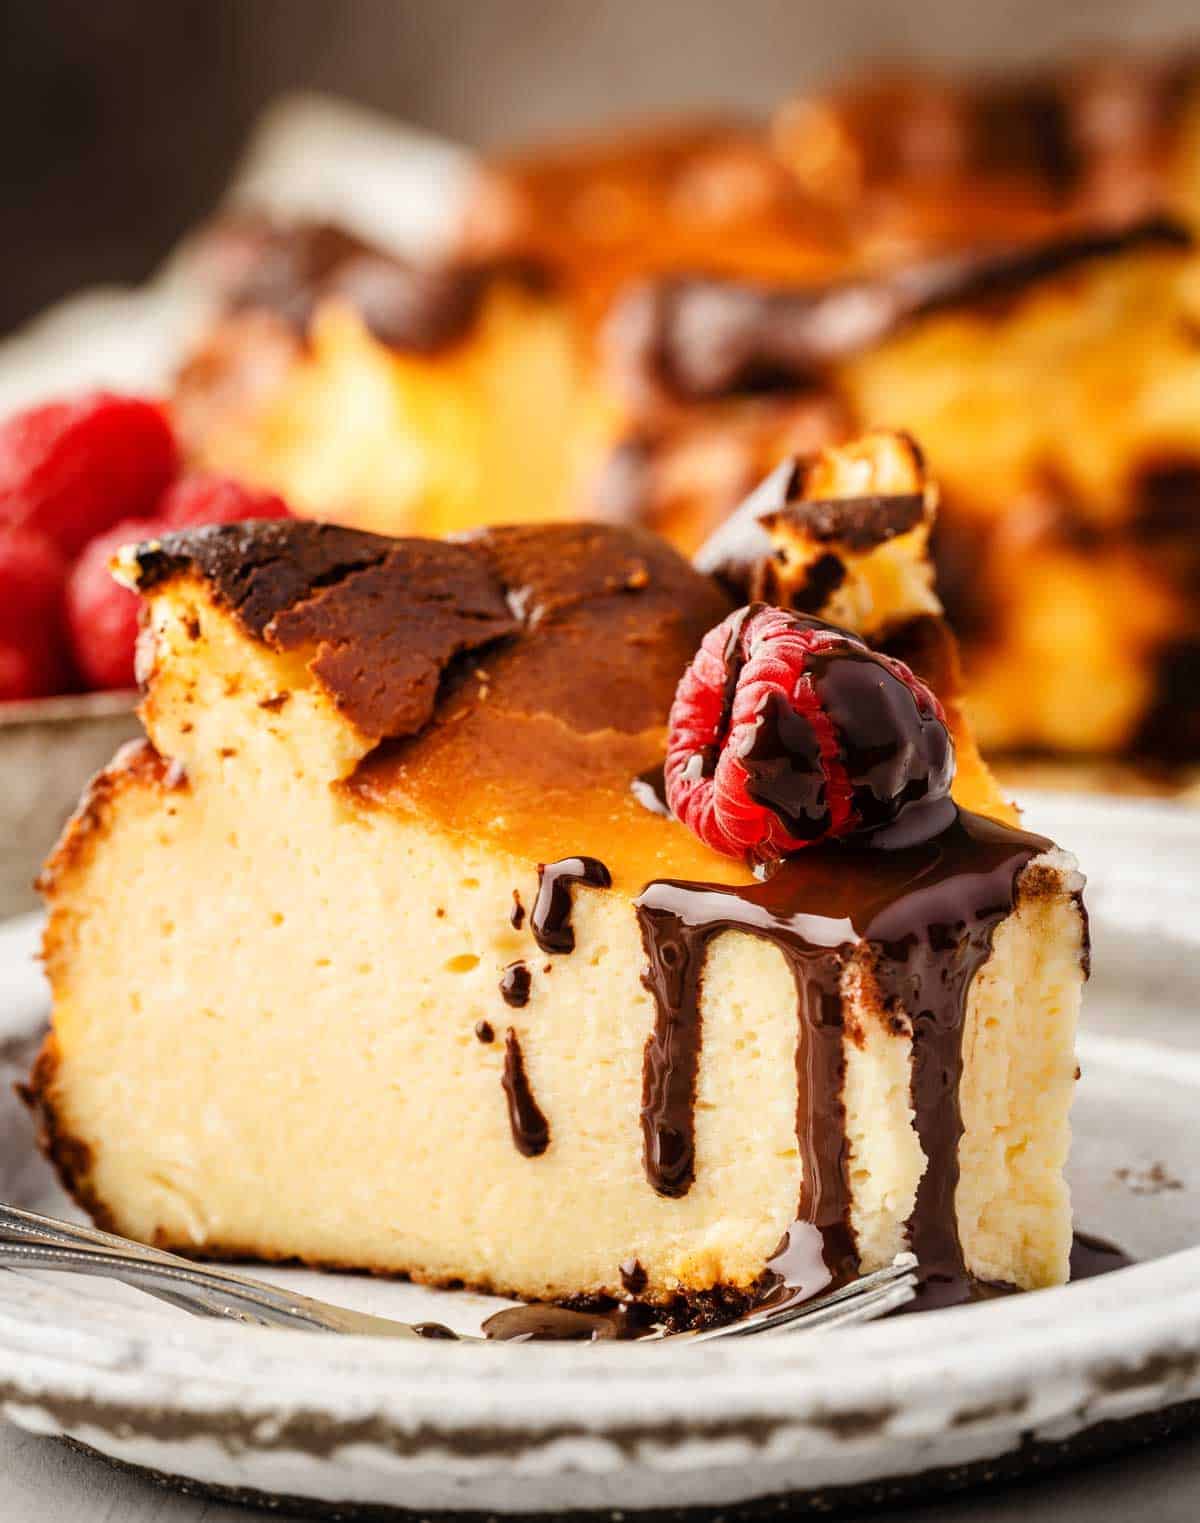
- Slice the cheesecake into wedges and serve it either at room temperature or chilled. Drizzle each slice with the warm chocolate sauce for that extra delicious touch!
Notes
Refrigeration:
- Cover the cheesecake with foil or plastic wrap.
- Place it in the refrigerator, where it can be stored for up to a week.
Freezing the Whole Cheesecake:
- Wrap the entire cheesecake in plastic wrap.
- Then, wrap it again with aluminum foil or place it in an airtight container that’s big enough to hold it.
- Properly sealed, it can be frozen for 3 months.
Freezing Slices:
- For individual slices, tightly pack them in an airtight container.
- Place the container inside a freezer bag, squeezing out excess air to prevent freezer burn.
- When you’re ready to enjoy a slice, you can thaw it in the refrigerator overnight or bring it to room temperature for a few hours before serving.
Nutrition
Nutrition information is automatically calculated, so should only be used as an approximation.
All rights reserved. CHEF JAR. All images and content are copyright protected. PLEASE do not use my images without my permission. If you want to share this recipe, PLEASE provide a link back to this post.


This cheesecake was pure heaven! Rich, creamy, and with that perfectly caramelized top. I was nervous at first, but it came out beautifully!
Sophie, I’m glad you loved it! That caramelized top is definitely the star. Thanks for sharing your success!